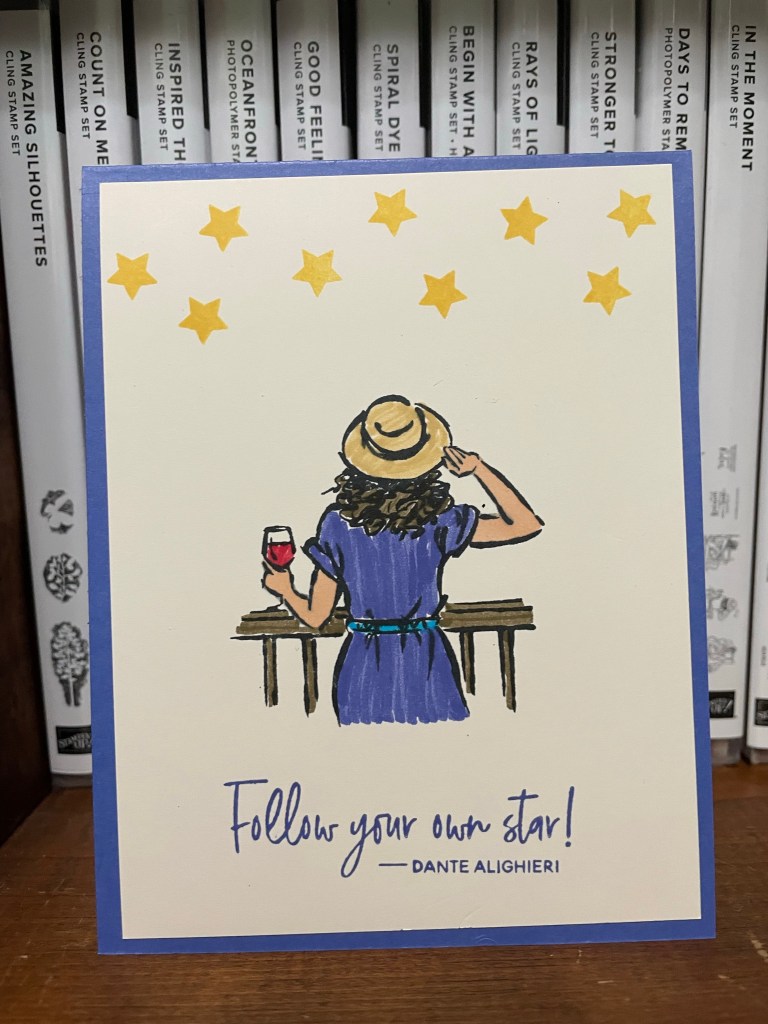
Being laid up with a stress fracture in my foot is finally giving me a chance to play with Stampin’ Up products from the January to June 2022 Mini Catalog and the 2022-2023 Annual Catalog. When I first saw each of these stamp sets, I knew I had to have them. The problem was, I have been so busy this spring that other stamp sets took precedence over the “In The Moment” stamp set. When I was challenged to use “something old, something new”, I knew exactly which stamp set to use for the “something old.” Then I perused my shelf for “something new”. My eyes fell on “Stepping Stones” stamp set which has really great quotations. I knew that they would pair together well.
As you can see, this was a pretty simple card. I started with an Orchid Oasis card base. I stamped the image of the woman from “In The Moment” in the center of a 5 1/4″ x 4″ piece of Very Vanilla with Memento Tuxedo Black Ink. I colored it using Stampin’ Write markers – Sweet Sorbet, So Saffron, Tahitian Tide, Orchid Oasis, and Soft Suede. I also used SU900 from the Natural Tones Stampin’ Blends collection for her skin. I then stamped the sentiment from “Stepping Stones” in Orchid Oasis. Finally I stamped the stars from the “Days To Remember” stamp set in Daffodil Delight. Afterwards I wondered if I should have only stamped one star. Let me know what you think in the comments.
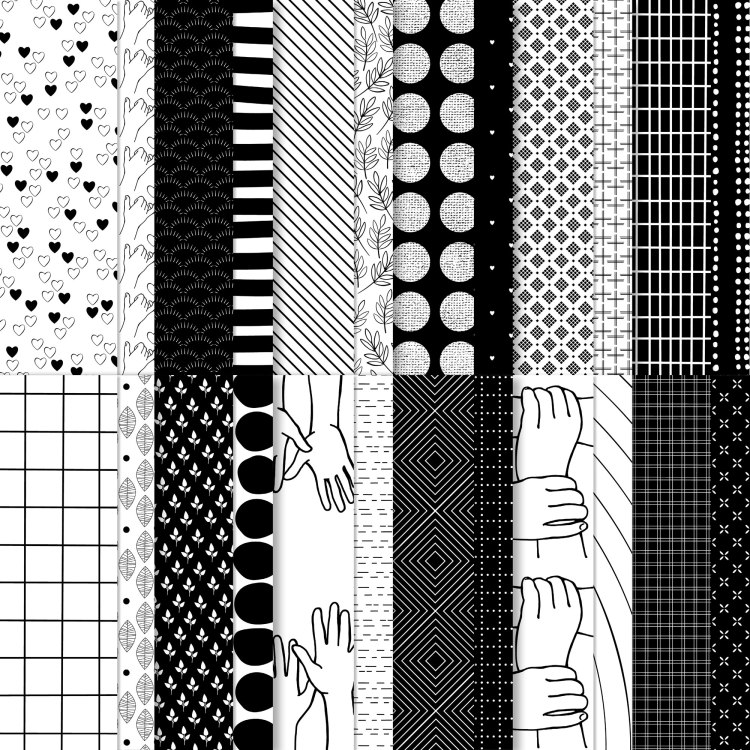
It is always fun to get new products when a new Stampin’ Up Catalog comes out but it is hard to say goodbye to products that are going away. That is the case with the All Together 6×6 DSP. It and all the products in the All Together Collection (except the Natural Tones Stampin’ Blends Collection) are going away today (May 31.) So I had to use the paper one more time before it retired.
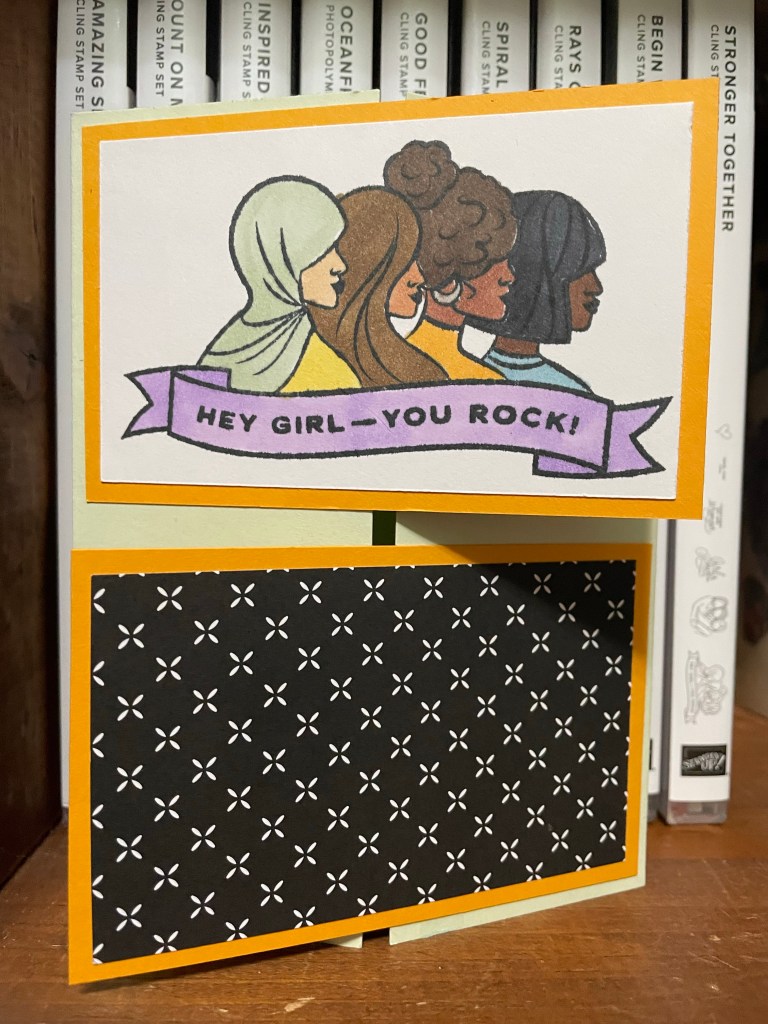
While I am also sad about the Here Together Stamp Set going away, I am excited about the Stronger Together Stamp Set in the new 2022-2023 Annual Catalog. The images are striking and the sentiments are powerful.
I thought this would be a great opportunity to make a crossover gate card with the image at the top and the DSP at the bottom. I started with a 5 1/2″ x 8 1/2″ piece of Soft Sea Form and scored it at 2 1/8″ from each side. I then cut two pieces of Mango Melody – 2 1/2″ x 4″. Both the DSP and Basic White pieces are 2 1/4″ x 3 3/4″. I stamped the image on the Basic White with Memento Tuxedo Black Ink and colored it with Stampin’ Blends. If you compare the two cards, I used the same colors but in different combinations. I used several of the Natural Tones Stampin’ Blends for the skin and the hair on the two women in the middle.
I am still getting used to the different shades and what combinations work. I would love to hear from you if you like the combinations. I also feel like something could have been added to the DSP panel. Please share your ideas in the comments.
Welcome to the NC Demos Blog Hop! We are so glad you are here! You might have already stopped by Jo Anne Hewins’ post and know this month’s theme, but if you are just popping in this month’s theme is “Something Old & Something New”.
I have loved butterflies ever since I was in Kindergarten and we studied monarch butterflies as they migrated through New York. I was fascinated by their amazing migration journey and the whole metamorphosis. I was amazed at how they would huddle together on the trees as they overwinter in Central Mexico or Southern California. By working together, they could survive the winter and breed the next generation.
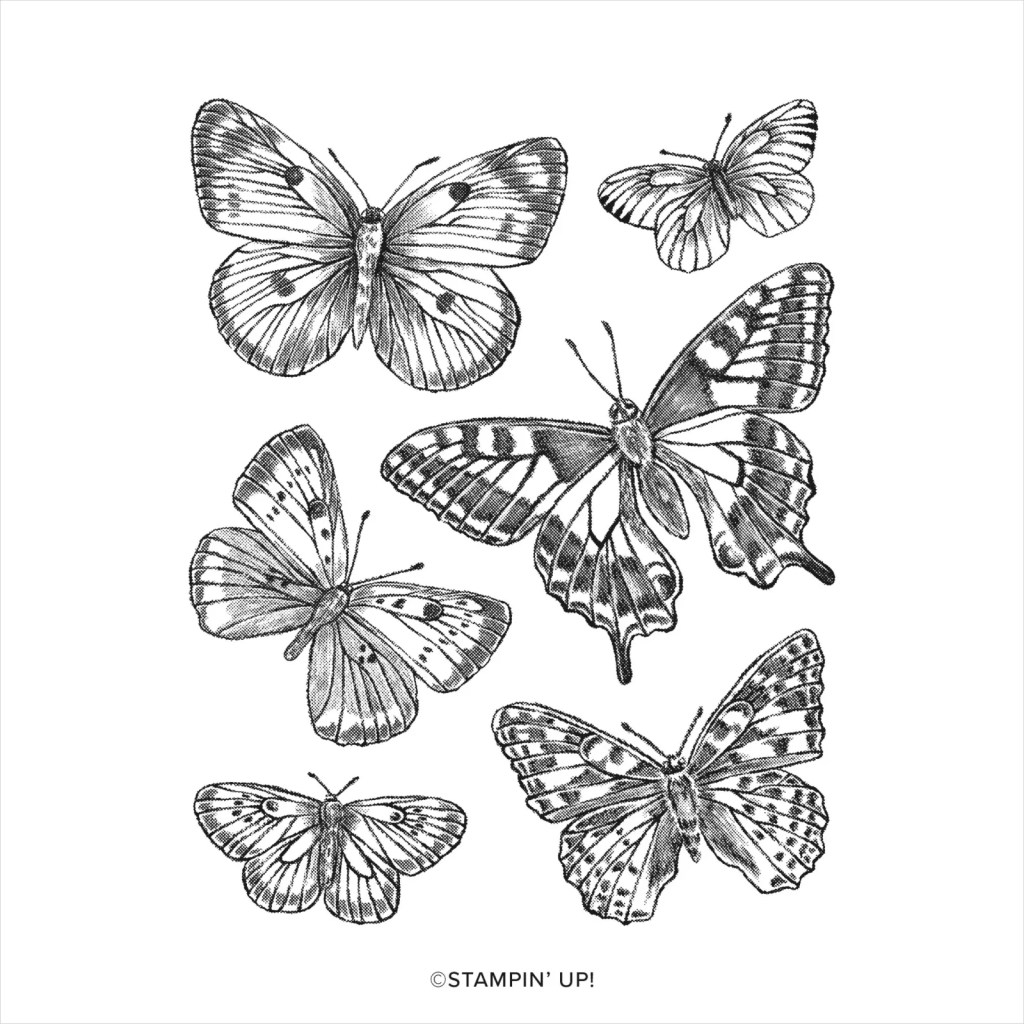
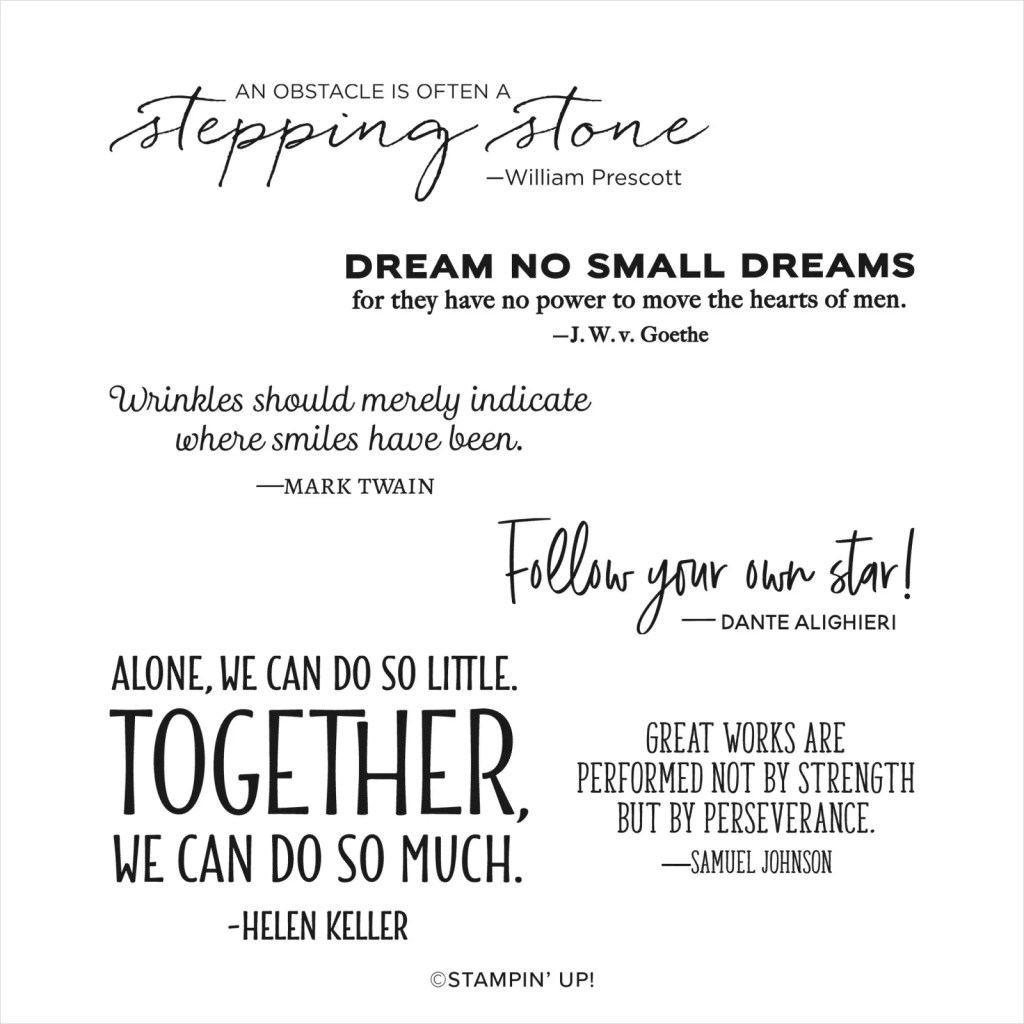
In working on the card for this post, I realized that I had not used the Butterfly Brilliance stamp set in awhile, despite my love of butterflies. I was excited that it carried over from last year’s catalog and decided to use it for this project. I needed a sentiment and was attracted to the Stepping Stones stamp set from the new 2022 -2023 Stampin’ Up Annual Catalog. It is filled with quotations, ranging from William Prescott to Mark Twain to Dante Alighieri. It was actually a quotation from Helen Keller that caught my attention as a perfect fit for the butterflies.
To create the card, I stamped the butterflies on a 5 1/4″ x 4″ piece of Very Vanilla using Memento Tuxedo Black Ink. I colored in the butterflies using the 2022-2024 In Color Stampin’ Write Markers. I thought about recreating real butterflies like Monarchs but decided to play with the new In Colors and create my own butterflies. I then stamped the sentiment using Orchid Oasis on Very Vanilla cardstock. I used the Stitched So Sweetly dies which (unfortunately) just retired. (As an alternate you could use the Stitched Rectangle Dies.) I used a sponge dauber to color the edges of the sentiment piece with Orchid Oasis ink. I then attached the sentiment piece to the card front using dimensionals and then attached the card front to a Basic Black card base using Stampin’ Seal. As a final touch, I added a few Brushed Brass Butterflies to the card.
Thank you for letting me share my project. Please stop by and see Toni Campana’s post. I know it will be great!
This month, the theme is New 2022-2024 In Colors. We really hope that you will be inspired by all the amazing creations the Pals are sharing with you! As you hop from blog to blog, we would love for you to leave a comment. You will find the lineup at the end of my post to help you “hop” along from Pal to Pal.
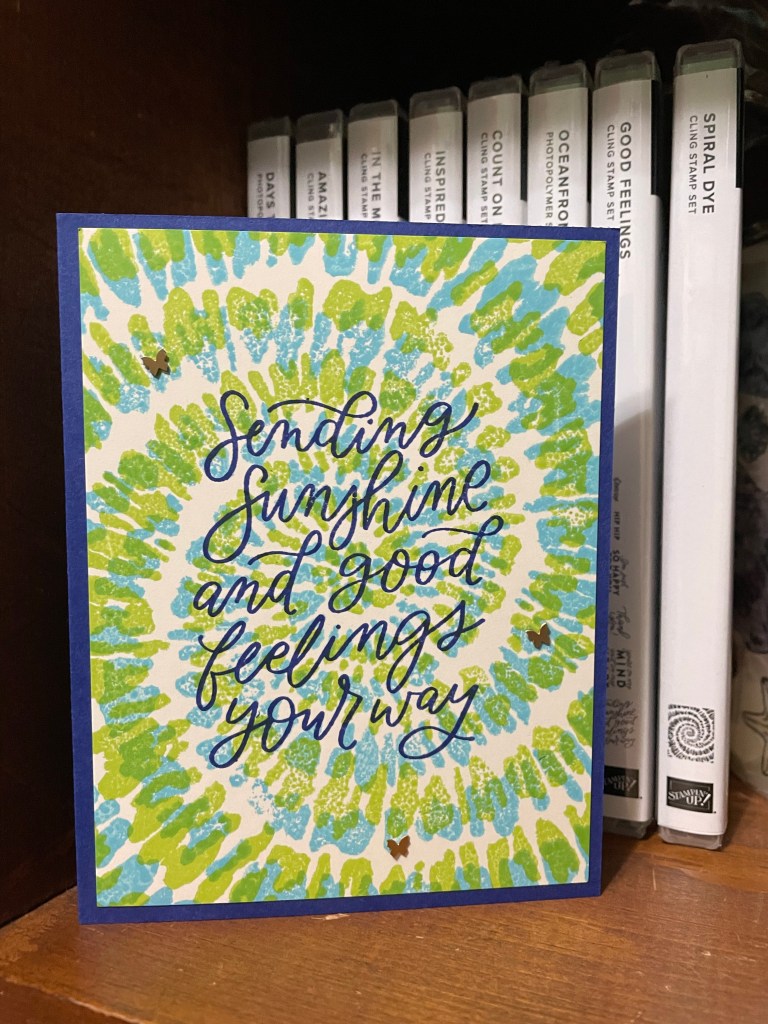
I have to admit, I wasn’t immediately in love with the 2022-2024 In Colors from Stampin’ Up. I am not a bright colors person so I just wasn’t sure about a couple of the colors, namely Parakeet Party and Tahitian Tide. Rather than avoid them, I decided to play with them first. I also wanted to play with the stamp set I received from Stampin’ Up for attending OnTour this spring. The Good Feelings stamp set is in the brand new 2022-2023 Annual Catalog. It is all sentiments but in lots of great fonts. My eyes fell on the “Sending Sunshine and Good Feeling Your Way” sentiment and knew it was the one for this project. But what to use with it? The obvious choice was Fabulous Frames dies since it coordinates with the stamp set, but then I spotted the Spiral Dye stamp set on my shelf. Perfect!
I mounted the Spiral Dye stamp on the Stamparatus and stamped it in Tahitian Tide on a 4″ x 5 1/4″ piece of Very Vanilla. I then turned it 180 and stamped it in Parakeet Party. Next I stamped the sentiment in Starry Sky, also an In Color but darker than the other two colors. I finished off the card front with a few Brushed Brass Butterflies. I then mounted the card front on a Starry Sky card base and done!
More inspiration awaits, so use the lineup below to visit the rest of the Design Team. The Pals are excited to show you what they’ve created! Then, please mark your calendars for our next blog hop on June 8th. Our theme will be “CASE the Catalog” when our Design Team creates a project found in the new Annual Catalog and CASE it with their own creative twist.
Have you ever thought about joining Stampin’ UP!? If so, now is the perfect time to do it.
Join in the month of May and receive new In Color products valued at $65.00. The products from the 2022-2024 collection are:
Grid Paper
Ink Pad Collection
Cardstock Collection
6×6 designer series paper (DSP) assortment
This In Color collection is in addition to the standard $125 worth of product for $99. Plus you get free business supplies, free shipping, and all the fun of being a part of Stampin’ Up! You’ll also get to shop from yourself, saving 20% on future purchases to include the new Mini catalog in June!
And you’ll get access to my team perks and have support from me, as well as, the entire Pals team run by Mary Fish. The best part? It comes with no obligation through September 2022. If you decide you like saving money, and the demonstrator perks that come with it, then there will be a low quarterly minimum to maintain. If you want to learn more, you can contact me or follow this link.
Thanks for joining me today for the Pals Fun Folds Blog Hop. Please make sure you check out all the awesome cards on today’s blog hop.
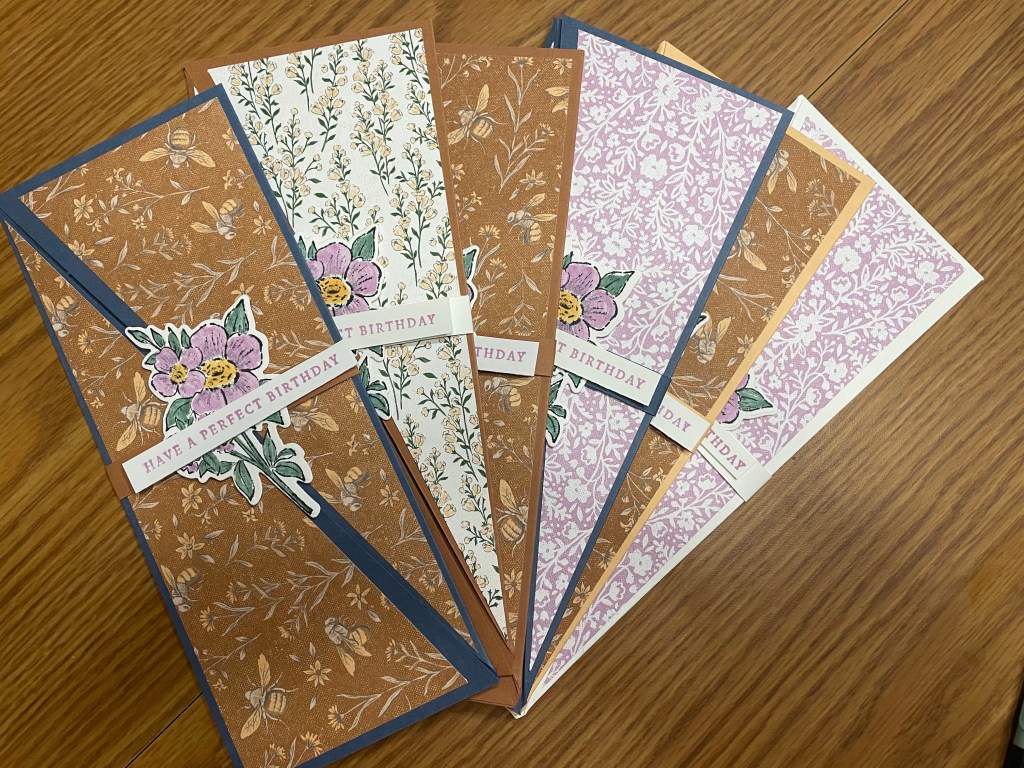
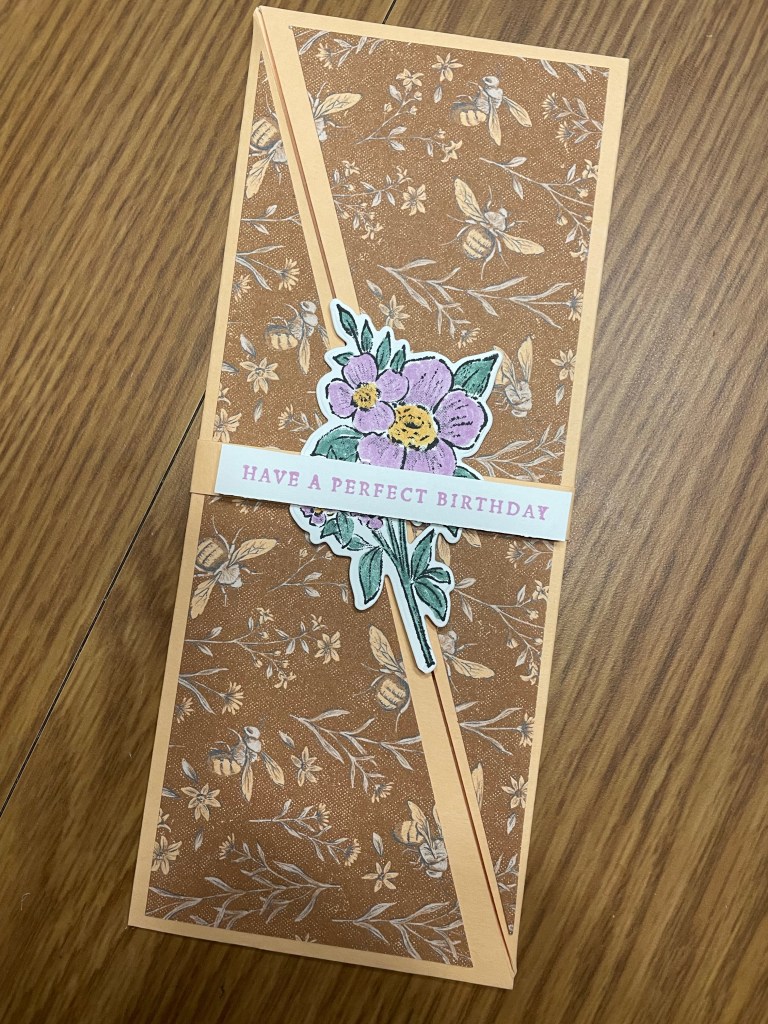
Sometimes I get carried away. I find a card design that I like and I make a whole bunch, especially if it involves designer series paper that I want to use. In this case, I needed to make a swap card for a NC Demos swap. Normally when you make a swap, you make all of them exactly the same but every once in awhile that isn’t possible. In this case, I didn’t have quite enough cardstock and DSP in the exact same colors and pattern that matched to make 12 cards. While they are not exactly the same in colors and patterns, they all use the same DSP and layout. I hope that counts!
To make this slimline diagonal cut card, I started with an 8 1/2″ x 10 1/2″ cardbase. I scored it at 3 1/2″ and 7″. (You can also score at 3 1/2″, flip the cardstock 180 and score at 3 1/2″ again.) I then made a diagonal cut from the top corner to the bottom of the first score line and repeated on the other end. This is one of the scariest things for me to do so I was constantly doubling checking that I had it positioned correctly not only for the start and end of the cut but also the direction of the cut so it would meet in the middle. Keep in mind, this is basically a gate fold card but on the diagonal.
Next I cut the Heart & Home DSP into 3 1/4″ x 8 1/4″ pieces and cut on the diagonal. I doublechecked that I was cutting the right direction to match the diagonal on the card base! I adhered these pieces to the base with Stampin’ Seal.
Time for some stamping! I stamped the bouquet from the Blessings of Home stamp set with Memento Tuxedo Black Ink on Basic White cardstock and cut it out with the die from the Flowers of Home dies. I colored it with Stampin’ Write Markers – Soft Succulent, Pale Papaya and Fresh Freesia.
I then stamped the sentiment, also from Blessings of Home stamp set, in Fresh Freesia on Basic White cardstock. I trimmed the sentiment and adhered it to the image piece with dimensionals.
I used a 1/2″ x 8″ strip of cardstock (same color as card base when possible). I wrapped it around the card base and adhered it to itself with Stampin’ Seal to form a belly band. I then adhered the image and sentiment piece to the band with Stampin’ Seal.
I hope you enjoyed this project. I was pleased that it was not as hard as I thought it would be. I would love to know what you think in the comments. Don’t miss out on the rest of this Fun Fold Blog Hop.
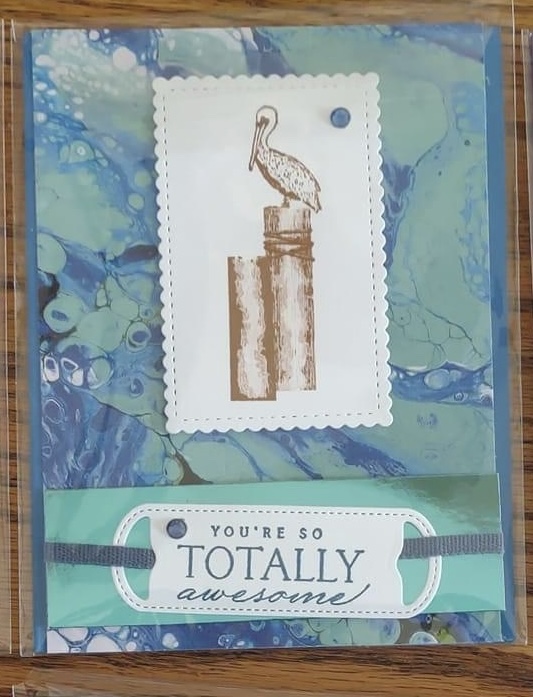
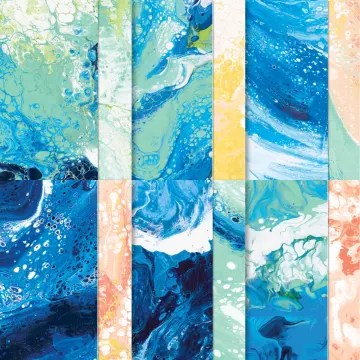
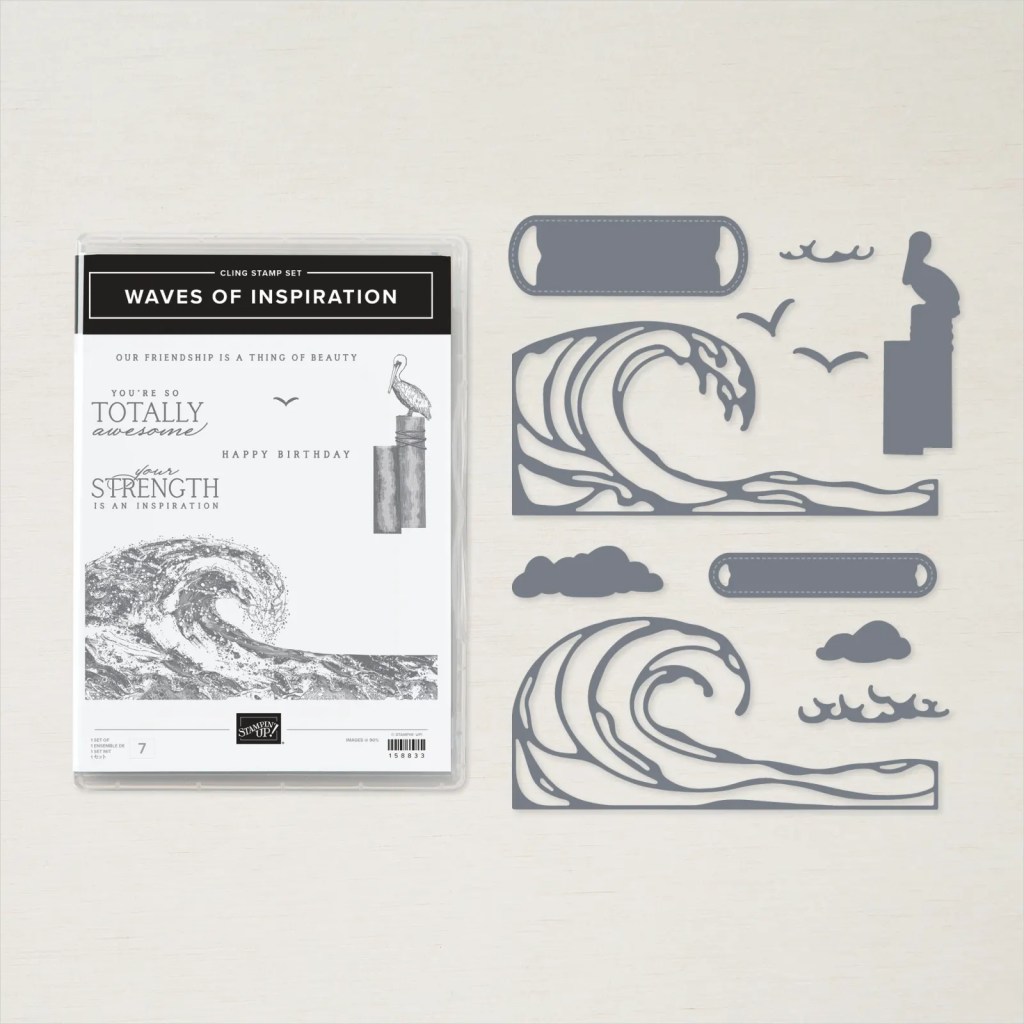
As a teacher, spring means lots of things. As temperatures outside rise, so do misbehaviors. The end of Spring Break signals the beginning of testing season with End of Year exams, AP exams and, well, the list goes on. Maybe because of all this, Teacher Appreciation Week is often celebrated in May. I try to give cards to my fellow teachers along with my daughter’s teachers. This spring I have been playing quite a bit with the Waves of Ocean collection. (You can check out my other posts – Cascade TriFold Card and April Pals Blog Hop.) This limited release collection includes Waves of Inspiration stamp set, Waves dies, Waves of the Ocean designer series paper and Rhinestone Waves Basic Jewels. While most people associate the beach with summer, lots of teachers (and students and parents) escape to the beach during Spring Break. I don’t like getting in the water and I don’t lay out in the sun, but I love sitting under a canopy or on the pier to watch the waves. While it is hard to spot the aquatic animals, the birds are frequent and beautiful to watch. There’s something special about seeing a line of pelicans fly just above the water. Awesome comes to mind, which is also a word I use to describe teachers.
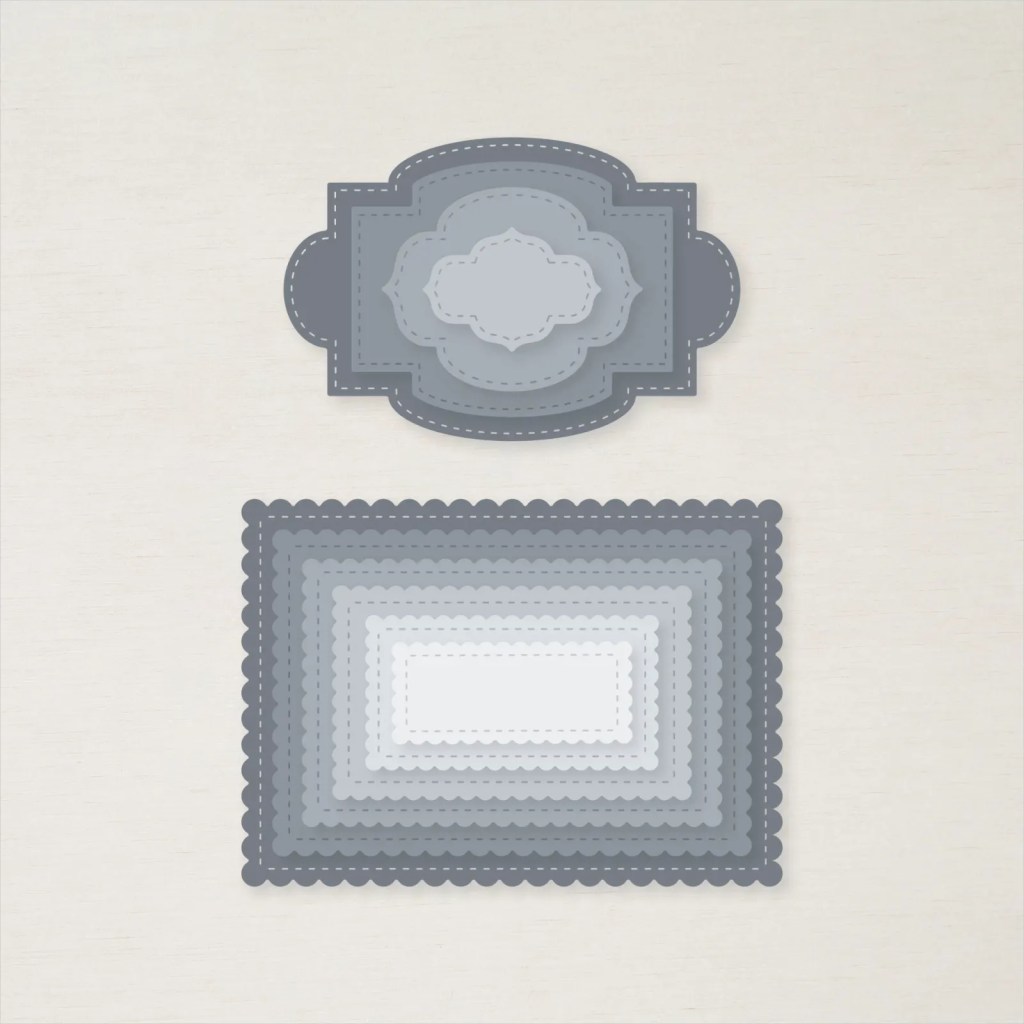
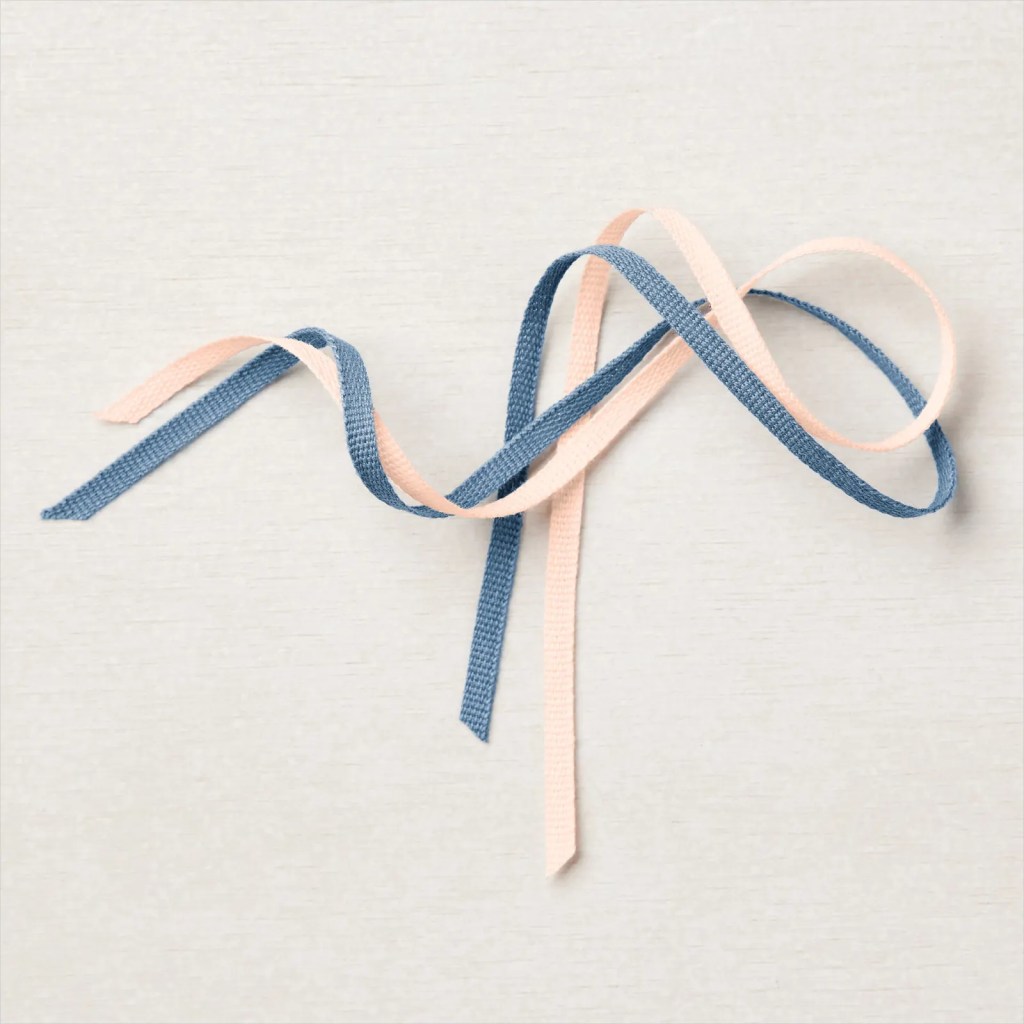
For this card I started with a 8 1/2” x 5 1/2” card base of Pacific Point scored at 4 1/4″. I stamped the pelican from the Waves of Inspiration stamp set on a piece of Basic White and cut it out with a die from the Stitched So Sweetly dies. I stamped the sentiment also from the Waves of Inspiration stamp set on Basic White and cut it out with a die from the Waves Dies. I cut a 12” x 12” sheet of the DSP into 4” strips. I then cut this into 2 pieces 5 1/2” inches long. I was left with a 1” x 4” strip on which I mounted the sentiment piece using dimensionals. This strip was mounted to the larger piece of DSP. I fed a piece of blue 1/8″ Cotton Ribbon through the ends of the sentiment piece and attached it to the back of the DSP with glue dots. I also attached the image piece to the DSP with dimensionals. I attached the decorated DSP to the card base with Stampin’ Seal and added a few rhinestone jewels for bling!
I hope you enjoyed this project. I really hope the teachers that receive the cards enjoy them. And if you like the Waves of Ocean collection, you only have a few more days to order the DSP. The Rhinestone Waves Basic Jewels are already gone but the Waves of Inspiration stamp set and Waves dies are carrying over to the new Annual Catalog. Get them and start creating!
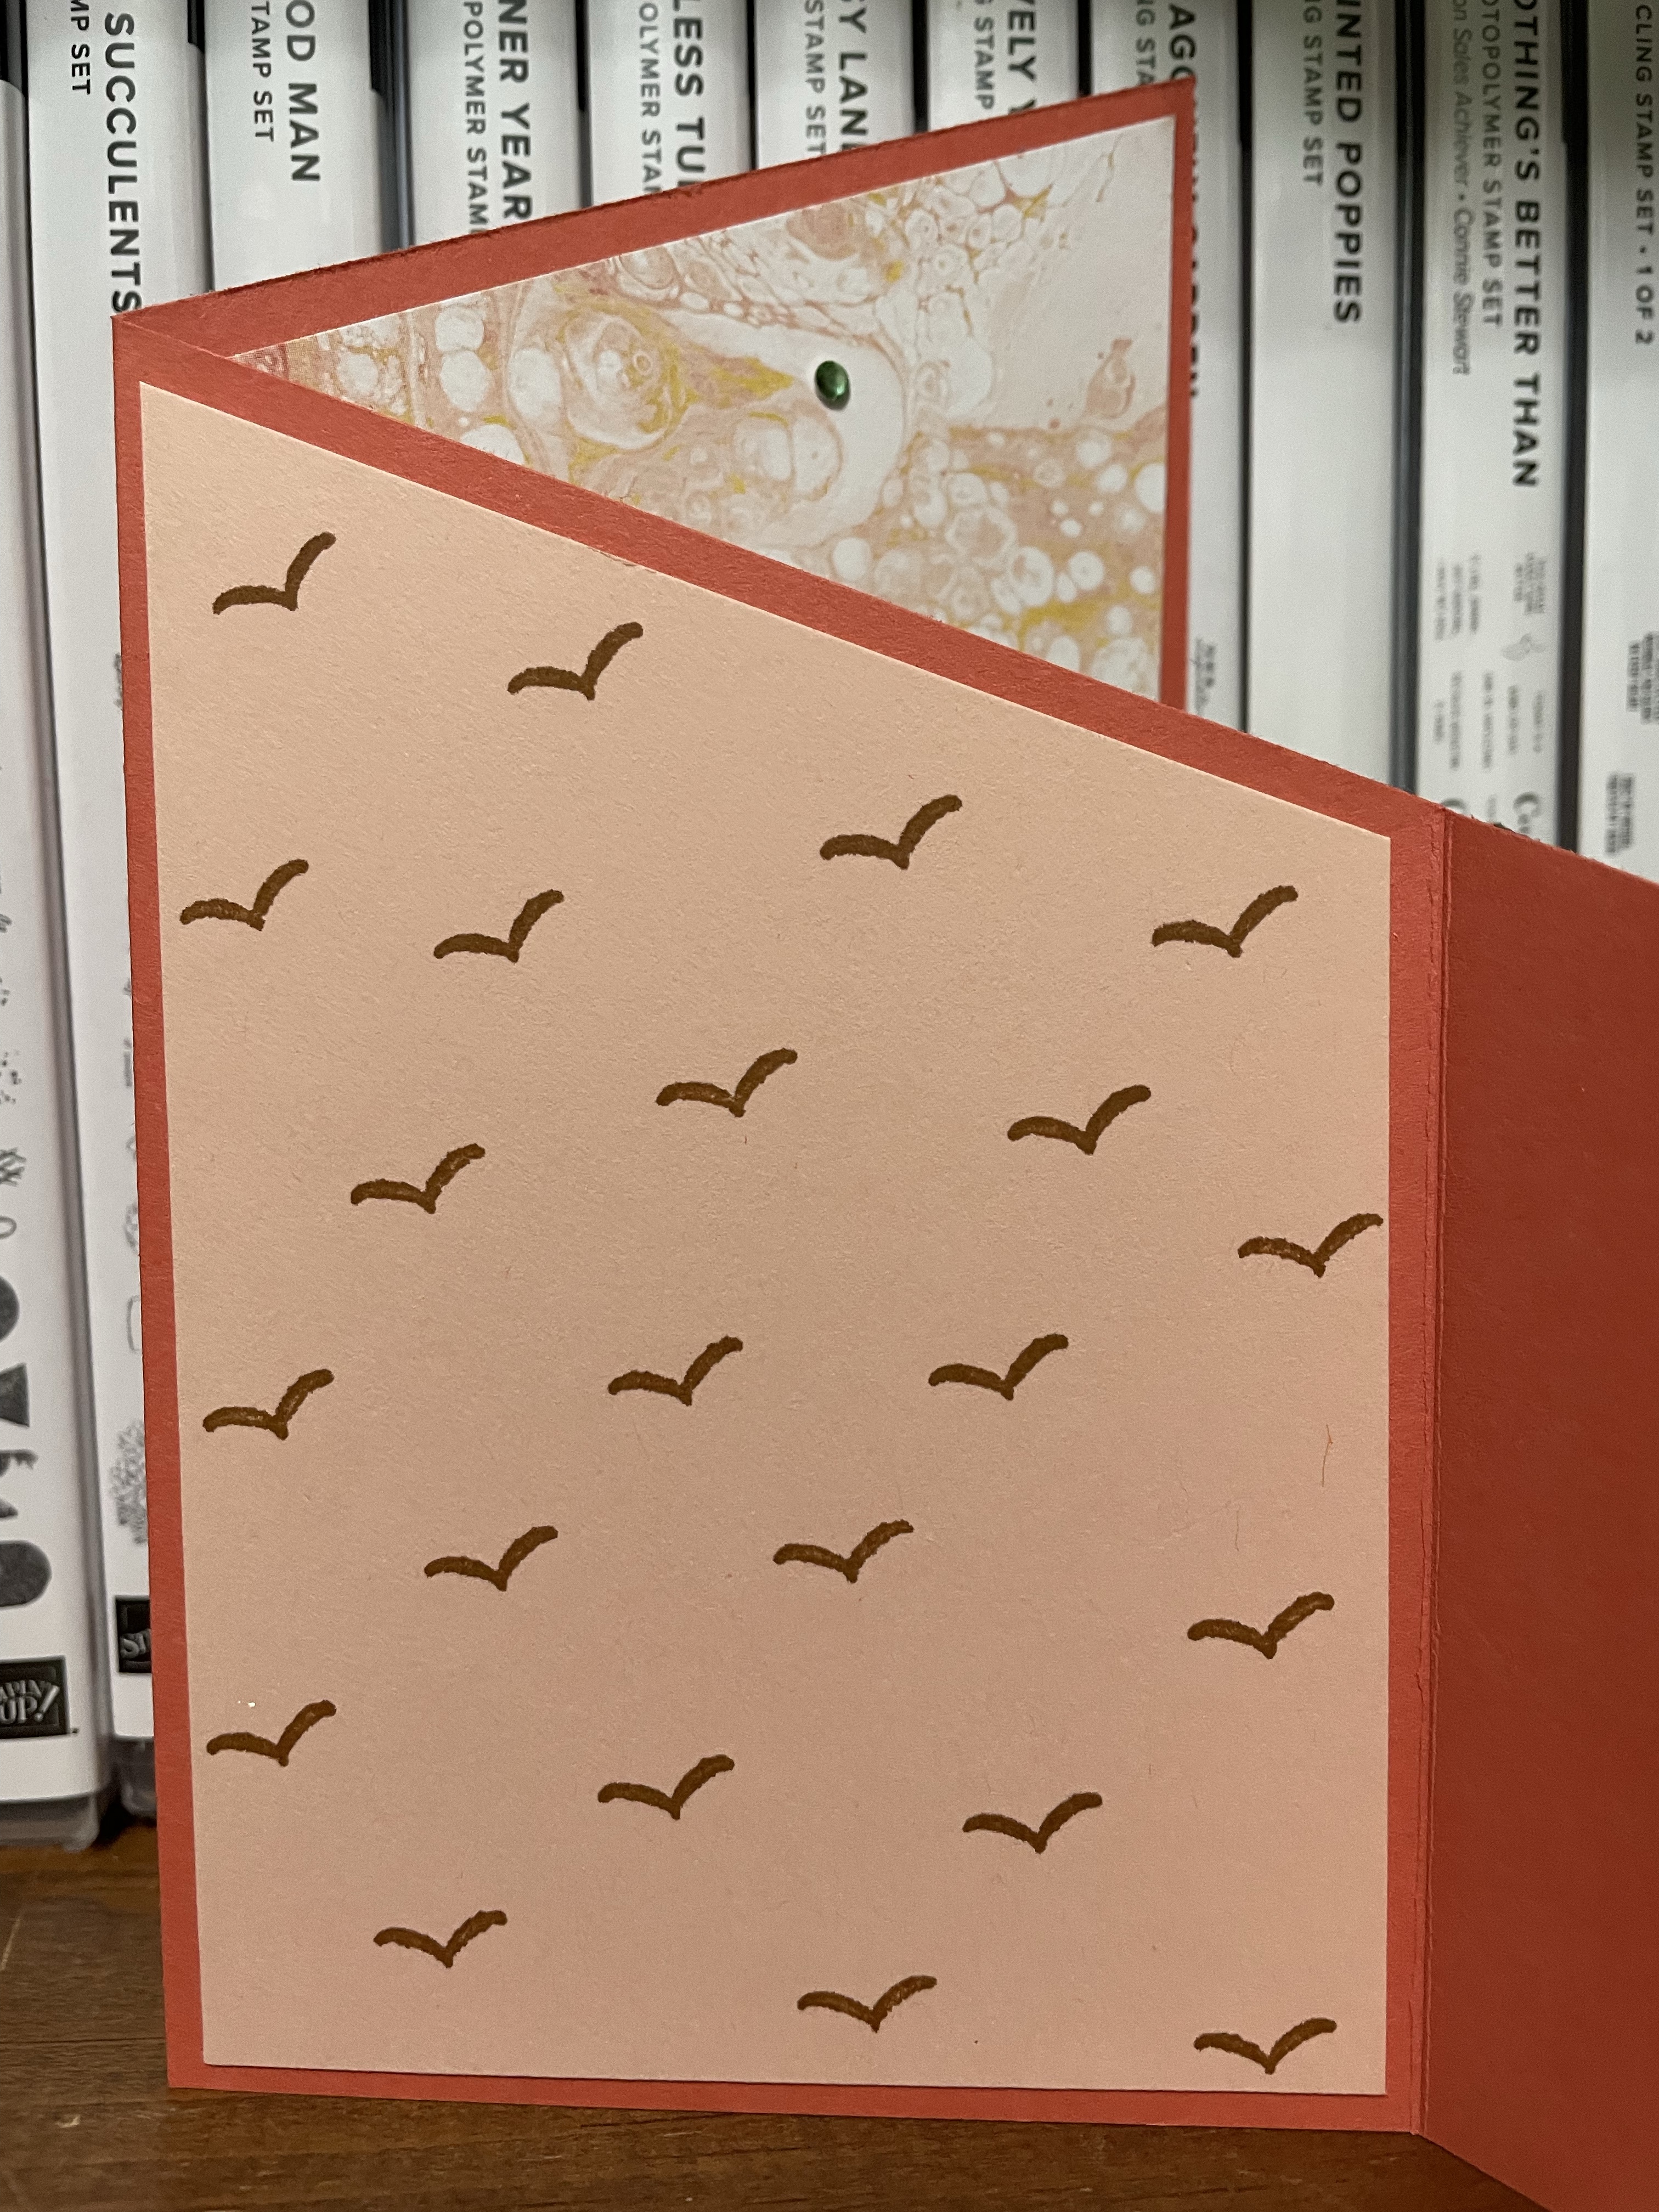
I love trying new fun folds but, to be honest, I prefer simple fun folds. When I spotted a card with this design by Crafts by Beth, I had to try it. On the one hand it seemed easy, but it also looked tricky. After all, diagonal cuts can be difficult to get right. Nevertheless I decided to give it a try and use the Waves of the Ocean Collection one more time.
To create the card base, I started with an 8 1/2″ x 11″ piece of Calypso Coral and trimmed it down to 8 1/2″ x 10 1/2″. I scored it on the long side at 3 1/2″ and 7″. I then marked it on the short sides at 2 1/4″ and 6 1/4″. Finally, I held my breath and made a diagonal from 2 1/4″ mark on left to 6 1/4″ mark on right. And the good news? It worked and I had two card bases from one piece of cardstock.
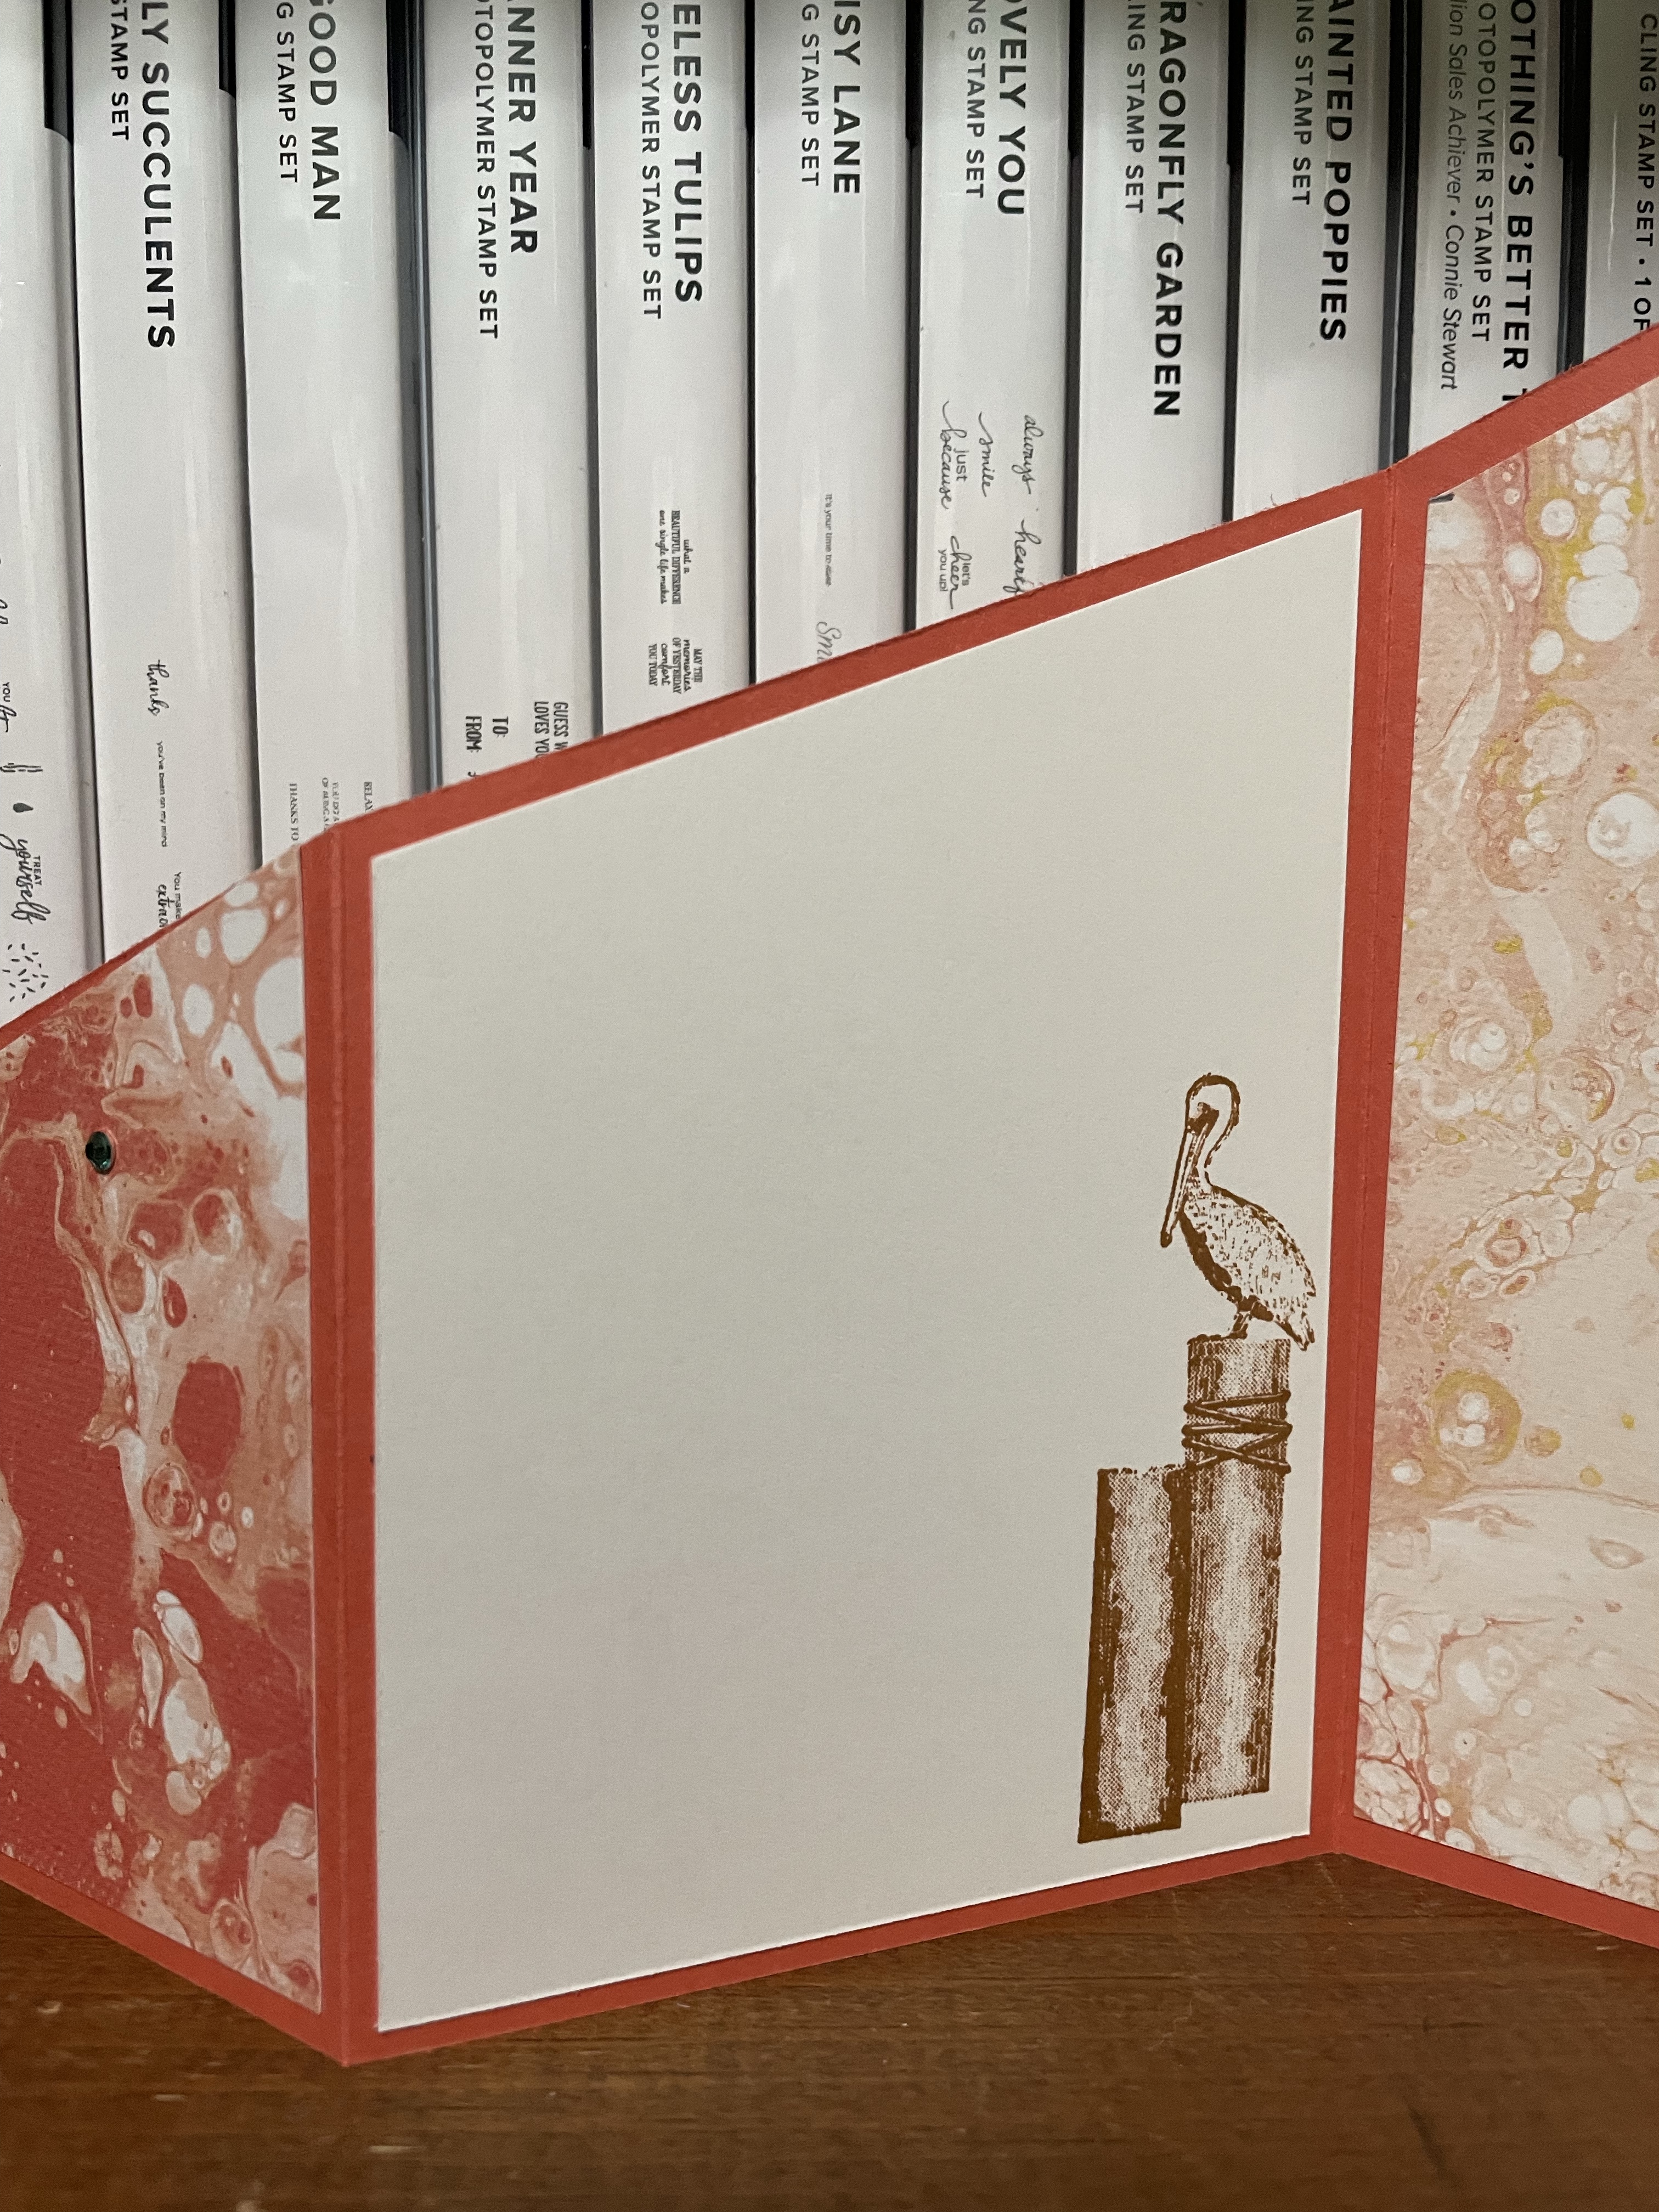
Next I turned my attention to the layering pieces. All of the pieces are 3 1/4″ wide. The Basic White and Petal Pink are the same. Start with a piece 3 1/4″ x 8″ long. Mark with pencil at 4 5/8″ on one long side and 3 3/8″ on the other side. Make a diagonal cut and once again you have two pieces. I stamped the Basic White with the pelican from the Waves of Inspiration stamp set. I repeatedly stamped the Petal Pink with the non-descript flying bird, also from the Waves of Inspiration stamp set. These are adhered on opposite sides of the middle panel.
Next I turned my attention to the DSP. I selected a few sheets from the Waves of the Ocean Designer Series Paper. I cut pieces that were 3 1/4″ wide. For the front panel, I cut the piece down to 5 3/8″ and marked it at 2″ on the left long side and 3 3/8″ on the right. Once again, I made a diagonal cut and had two front panels. For the back panel, I took a 3 1/4″ x 10 3/8” piece of DSP and marked the left long side at 4 3/8″ and the right at 6″. I made one last diagonal cut and had two back panels. I then adhered them to the card base.
For the sentiment, I chose the wider sentiment die from the Waves Dies and stamped the sentiment from the Waves of Inspiration stamp set on Basic White. I then cut an 8″ piece of White Frayed Ribbon and fed it through the ends of the sentiment piece. I wrapped it around the card and attached the two ends with a glue dot. I then wriggled the sentiment piece and the ribbon so that the sentiment piece hid where the ribbon came together. For a final touch I added the Rhinestone Waves Basic Jewels semi-randomly on the DSP. I say semi-randomly because I used three on each card and basically arranged them left, right, left when looking at the front of the card, making sure that I placed them so they would be seen on the DSP.
I hope you have enjoyed this fun fold card and will give it a try. I also hope that you will snatch up the Waves of the Ocean DSP before it disappears from the Stampin’ Up catalog on or before May 2. The Rhinestone Waves Basic Jewels are already unavailable but you can easily use the regular Rhinestone Basic Jewels. The Waves of Inspiration bundle which includes the Waves of Inspiration stamp set and Waves Dies are early release items from the 2022-2023 Annual Catalog so they will continue to be available after May 2, but why wait?
Have fun crafting and leave me a comment. I love to see your thoughts and opinions.
This month, the theme is Fabulous Flowers. We really hope that you will be inspired by all the amazing creations the Pals are sharing with you! As you hop from blog to blog, we would love for you to leave a comment. You will find the lineup at the end of my post to help you “hop” along from Pal to Pal.
So, you might be wondering, where are the flowers? Can I get away with saying they were washed away by the ocean waves in Stampin’ Up’s beautiful collection, “Waves of the Ocean”? Maybe that April Showers bring May Flowers so there were no flowers yet?
I didn’t think so.
Here’s the truth. I mixed up the theme for this month and rewound to February’s theme of “Birthday Projects”. After all, it’s a great theme and I was so excited to use the “Waves of the Ocean” collection that I forgot our theme. I hope you will forgive me and enjoy these waves instead of flowers. And I promise to get a good night’s sleep and make a card with flowers.
In case you are curious about the card I made, as I mentioned, I wanted to use products from the “Waves of the Ocean” collection before some of them disappeared from the catalog on May 2. I started with a 4 1/4″ x 11″ card base of Pacific Point. Occasionally I like this orientation for display purposes. You are less likely to see what is inside the card. I adhered a 4″ x 5 1/4″ piece of Waves of the Ocean Designer Series Paper to the card base. I then die cut the two waves from the Waves Dies – one Night of Navy and one Pacific Point. Since I forgot to use the adhesive sheet before cutting, I adhered the wave pieces with the Fine Tip Glue Pen. I stamped the sentiment from Waves of Inspiration stamp set with Pacific Point ink on Basic White cardstock and cut it out with one of the dies from the Waves Dies. I “borrowed” the 1/8″ Cotton Ribbon from the “New Horizons” Suite to thread through the ends of the die cut. The ribbon is a combo pack and includes Misty Moonlight and Petal Pink. I used Dimensionals to pop up the sentiment. Although I normally am not much for bling, I added some of the Rhinestone Waves Basic Jewels for, well, bling!
I hope you like the card even if I forgot the flowers. I always like to hear your thoughts and opinions. Please leave a comment and let me know what you think.
More inspiration awaits, so use the lineup below to visit the rest of the Design Team. The Pals are excited to show you what they’ve created! Then, please mark your calendars for our next blog hop on May 11th. Our theme will be New 2022-2024 In Colors, with the Pals showcasing the brand new In Colors in the new Annual Catalog.
This month, the theme is Cute Critters. We really hope that you will be inspired by all the amazing creations the Pals are sharing with you! As you hop from blog to blog, we would love for you to leave a comment. You will find the lineup at the end of my post to help you “hop” along from Pal to Pal.
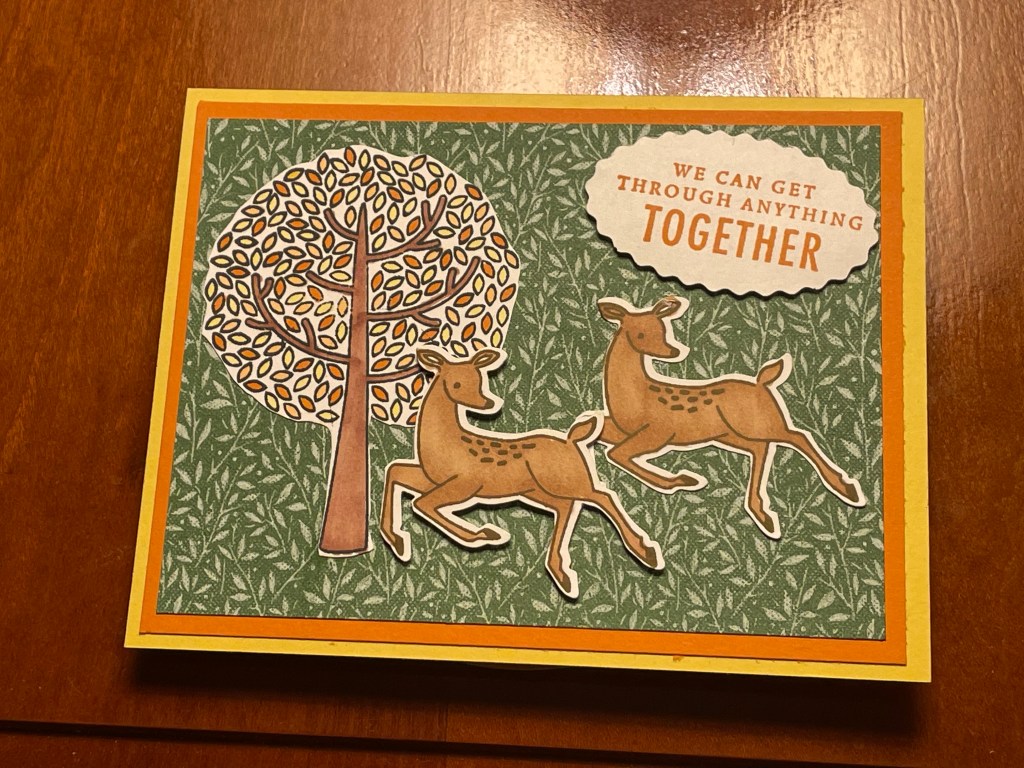
I was so excited when Stampin’ Up released the “Friends of the Forest” stamp set in the January to June 2022 Mini Catalog and indicated that it coordinated with the Deer Builder punch. I had the Deer Builder punch from the July to December 2021 Mini Catalog and knew that it was carrying over. I love when Stampin’ Up extends the life of a punch by adding stamp sets that coordinate with existing punch. Now I had to figure out how I was going to create with it!
For this card I knew the focus needed to be on the “critters” but this stamp set had so many! Since I had the Deer Builder Punch just waiting to be used, I decided to focus on the deer. I stamped two deer from the “Friends of the Forest” stamp set with Memento Tuxedo Black ink pad and punched them out with the Deer Builder punch. I colored the deer with one of the Natural Tones Stampin’ Blends (SU500). I didn’t want the deer to be unprotected so I stamped a tree, also from the “Friends of the Forest” stamp set, and colored it with Stampin’ Blends. For this tree, I decided to go with a fall color scheme so I colored the tree with Pumpkin Pie and Daffodil Delight and cut it out with my paper snips. I thought it would be nice to bring in some DSP as background for the deer so I pulled out this piece (3 3/4″ x 5″) from the Heart & Home DSP. Since I had two deer I decided it would fitting to use this sentiment from the Blessings of Home stamp set. I stamped it in Pumpkin Pie and punched it out with the Double Oval punch. I layered a 4″ x 5 1/4″ piece of Pumpkin Pie cardstock on the Daffodil Delight card base (5 1/2″ x 8 1/2″, scored at 4 1/4″). I then layered the DSP on top of the Pumpkin Pie piece. I adhered the tree and one deer with Tombow Multipurpose glue. The sentiment and the other deer were popped up with Stampin’ Dimensionals.
These two card fronts were my initial playing around with the “Friends of the Forest” stamp set. I hesitated to post them but wanted to show a few more ideas with the stamps. Besides, who doesn’t like a blooper reel? While not perfect, these card fronts were my chance to play with the stamps, see the different combinations and try some coloring and blending with them. I really enjoyed figuring out where to place the different critters and which direction they faced. As soon as I saw the bird and the stump, I knew I had to put them together. I’m thinking of having the fox jumping over the stump on a future card.
I had a little trouble with the background since my Balmy Blue Classic Stampin’ Pad needed to be reinked. Of course, I didn’t realize that until I had already started with the blending brush and wondered why it wasn’t blending well. Lesson learned – do not try to blend a light background immediately after reinking an ink pad! And in case you are wondering, I also experimented with blending some Granny Apple Green after I had already blended in Balmy Blue. Also, can you tell which card has blending over the animals?
It was fun creating these items out of the Friends of the Forest stamp set and a few of the coordinating items. I would love to know what you think so please leave a comment.
More inspiration awaits, so use the lineup below to visit the rest of the Design Team. The Pals are excited to show you what they’ve created! Then, please mark your calendars for our next blog hop on April 13th. Our theme will be Fabulous Flowers when our Design Team creates a project using any of the many beautiful flowers in our catalogs.
Until then, have fun in your craft space.
A new kit has been added to the collection! The Robot Buddies Kit includes 9 card bases—3 each in 3 designs—and 9 envelopes. It also includes sticker sheets and printed die-cuts to decorate the cards and two Classic Stampin’ Ink Spots in Bermuda Bay and Pumpkin Pie. The finished card size is 5-1/2″ x 4-1/4″ (14 x 10.8 cm). And, you guessed it, the coordinating colors are Balmy Blue, Bermuda Bay, Granny Apple Green, Night of Navy, and Pumpkin Pie.
During the month of March, you can snag the Mini Stampin’ Cut & Emboss Machine at a 20% discount! This miniature machine is compatible with a large selection of Stampin’ Up! embossing folders and dies. Build your craft collection and combine the Mini Stampin’ Cut & Emboss Machine with any (or all!) of the select stamp-and-die bundles that are also available for 20% off during the month of March!
Welcome to the NC Demos Blog Hop! We are so glad you are here! You might have already stopped by Jo Anne Hewins’ post and know this month’s theme, but if you are just popping in this month’s theme is Punch Bundles. Stampin’ Up offers many bundles of stamp sets and punches but they don’t always get the attention they deserve.
I chose the Happy Hedgehogs from the January to June 2022 Mini Catalog. Why this one you ask? My daughter likes hedgehogs, plain and simple. The first card uses a simple fun fold that allows you to show the inside and front at the same time. The card base is 4 1/4″ x 11″. It is scored at 5 1/2″. I cut out 2″ from the top of the front panel. On the inside I used a 4″ x 5 1/4″ piece of Basic White. For the bottom front, I used a 2 1/8″ x 5 1/4″ piece of Basic White. I lined up the tree image so I could stamp it on the inside as well as the front. I then proceeded to decorate the front with a few more images included the smaller hedgehog. I stamped the larger hedgehog with Soft Suede on a scrap piece and punched it out. I colored both hedgehogs with the Ivory and Bronze Stampin’ Blends. I colored the other images with Petal Pink, Melon Mambo, Granny Apple Green and Poppy Parade Stampin’ Blends. I popped up the larger hedgehog with a dimensional and placed it in front of the base of the tree facing the smaller hedgehog. I then stamped the sentiment with Poppy Parade directly on the card front. Maybe my daughter will like it well enough to give it to a friend.
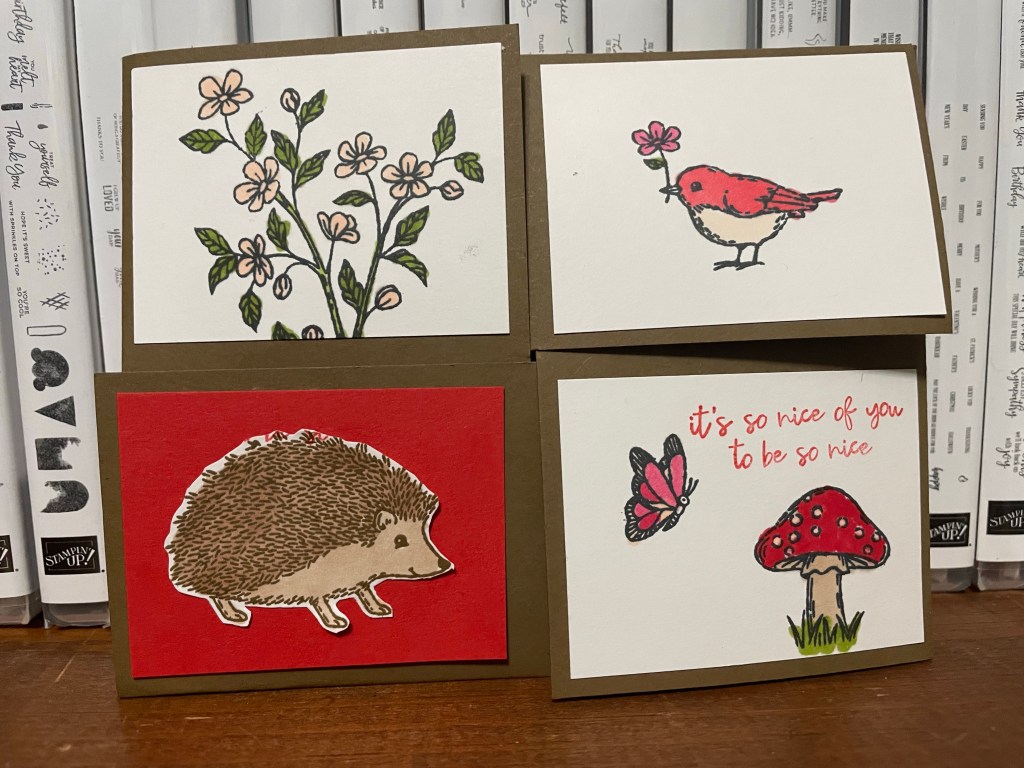
When I saw all the different images, I imagined putting them in individual squares. I have been dying to make a quarter fold card and this was the perfect opportunity. The bottom card base is 11″ x 4 1/4. On the 11″ side, score at 2 3/4″ and 8 1/4″. The top card base is 8 1/2″ x 5 3/8″. on the 8 1/2″ side, score at 2 1/8″ and 6 3/8″. The three Basic White pieces and the Poppy Parade piece are 2 1/2″ x 1 7/8″. Inside there is a 4″ x 5 1/4″ piece of Basic White. It actually wasn’t hard to put together. Lay the top card base on the bottom card base so it looks like a plus sign and adhere with Stampin’ Seal. Adhere the inside piece and close the flaps, alternating them as you close them. I stamped the images in Memento Tuxedo Black Ink and colored them with the Stampin’ Blends. I punched out the hedgehog and adhered it to the Poppy Parade piece to make it stand out a little more.
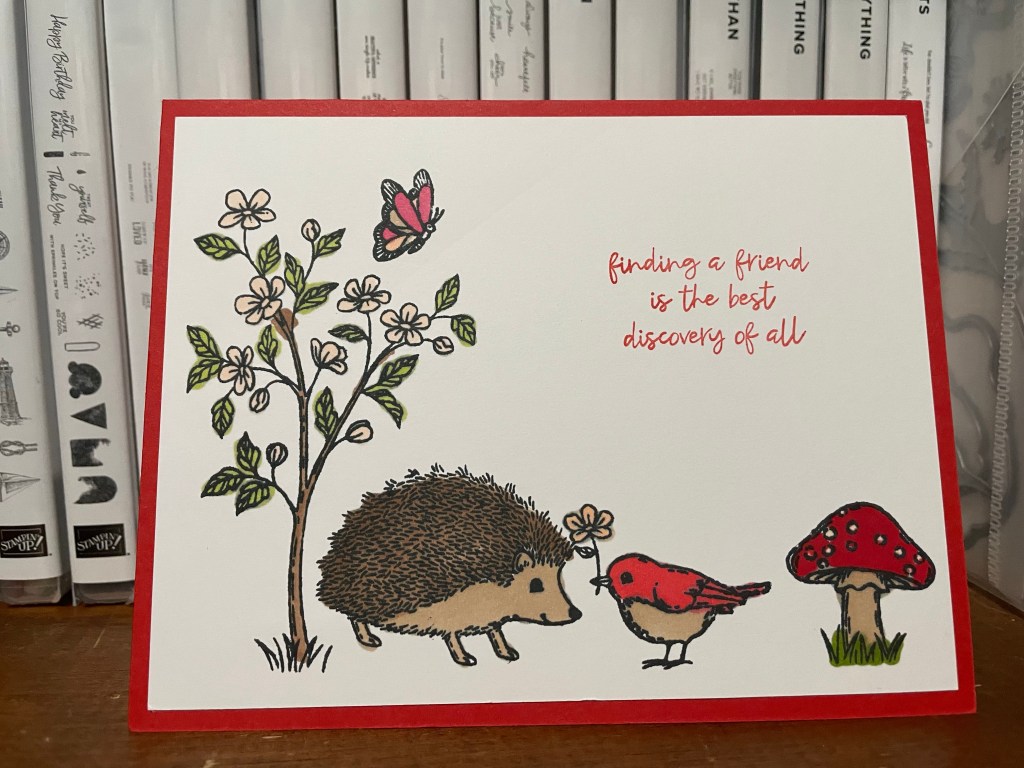
The last card was actually the first I made. I started with just the stamps to get a feel for the stamp set. It was fun seeing how I could use most of the images to create this scene. Sometimes it is fun keep it simple – stamps, ink and paper is all you need.
Thank you for letting me share my projects. Please leave me a comment to let me know what you think of my card. Don’t forget to stop by and see Toni Campana’s post if you didn’t start there. I can’t wait to travel there next!