Who doesn’t need a good gift card holder? After all, so often a gift card is the best option for a gift, especially if you are mailing it or not able to give a gift in person. Besides, who wants to mail a bulky package these days? I am not sure where I got the idea for this gift card holder originally but it is super simple.
First start with a 4 1/4″ x 11″ piece of cardstock. I chose Old Olive since I wanted to use the Cute Halloween 6″x6″ Designer Series Paper from the July – December 2021 Mini Catalog. I scored it at 2 1/2″ and 5 1/2″. I folded it in half (valley fold) at 5 1/2″ and mountain fold at 2 1/2″. I put Tear and Tape along the edges of what would become the pocket for the gift card. Before adhering it, I punched a notch using the bottom of the cat on the Halloween punch. I then cut a piece of DSP 2 3/4″ x 4″ and adhered it to the front flap of the gift card holder. Actually before adhering it, I adhered a piece of the Black and White Gingham Ribbon using glue dots. I then took a 4″ x 5 1/4″ piece of Basic White and stamped a few images from the Cutest Halloween stamp set along the right 4″ side. I adhered it to the inside of the card. I stamped a sentiment from the Cutest Halloween stamp set on a 1/2″ strip and trimmed the ends with the Lovely Labels punch. I adhered it to a 3/4″ strip of DSP and trimmed the ends also with the Lovely Labels punch. I punched out a few images from the Cute Halloween DSP using the Halloween Punch and attached them to the front using dimensionals. I am not much for bling but I did attach a few from the Cute Stars Adhesive Backed Sequins.
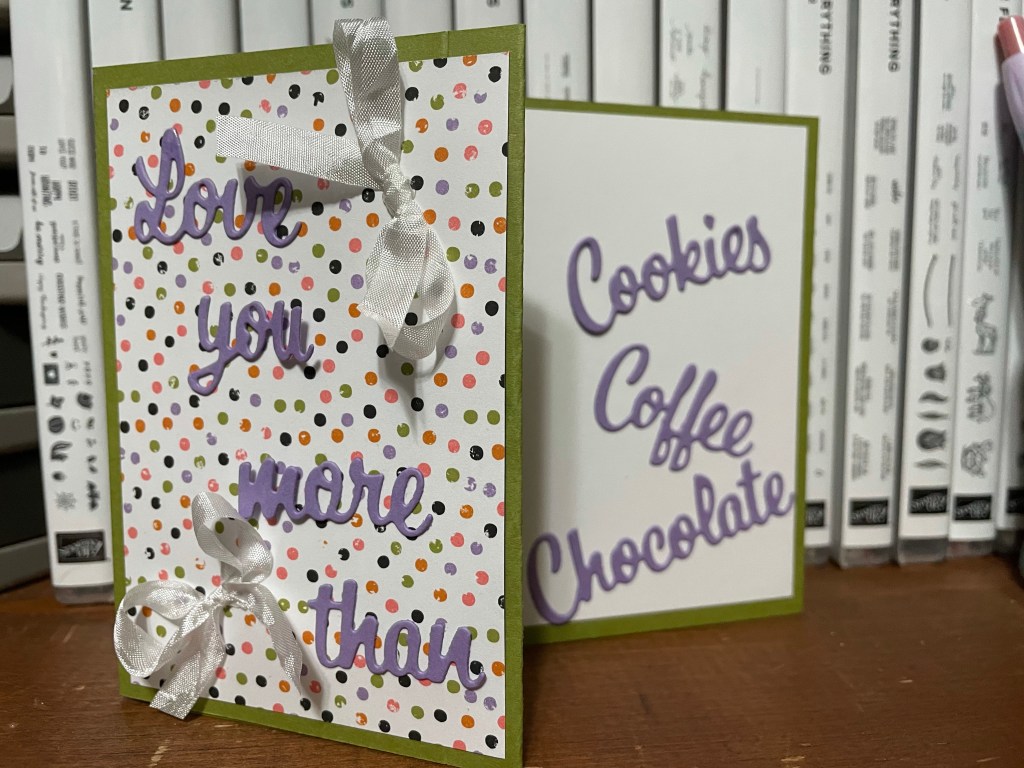
I took a look at the dots on the DSP and realized that it didn’t have to be Halloween. So, I put together another gift cold holder using the words from the “Love You More Than” dies. I pulled out one of the colors from the DSP – Highland Heather – and added a few bows out of Crinkled Seam Binding Ribbon. This was perfect to send to my daughter and she will never know that I used Halloween Paper. (Unless she actually reads my blog post!)
Product List
Cutest Halloween stamp set
Halloween punch
Lovely Labels punch
Love You More Than Dies
Cute Halloween 6″x6″ Designer Series Paper
Old Olive cardstock
Highland Heather cardstock
Basic White cardstock
Black & White Gingham Ribbon
White Crinkled Seam Binding Ribbon
Pumpkin Pie Stampin’ Pad
Mango Melody Stampin’ Blends
I hope you have enjoyed these projects. Please subscribe to receive future posts. Who knows what I will think of next!
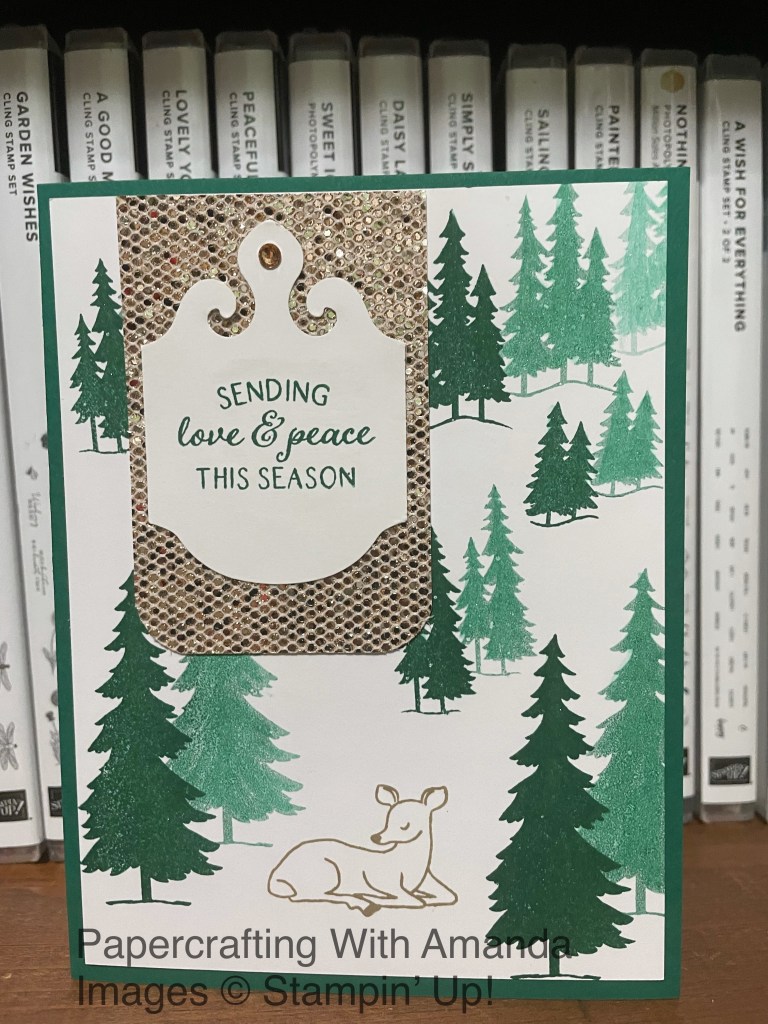
There is something peaceful about winter in the woods. Just looking at a sitting deer in the snow among the trees brings me a sense of peace. While I rarely get to see this in real life, I love that I can create it on a card to send to people.
The stamped images are from the Peaceful Deer stamp set in the July to December 2021 Mini Catalog. Shaded Spruce seemed like the natural choice for the trees and I continued the color scheme for the card base and sentiment. I stamped off the trees once to create the illusion of depth. This card also features the Elegant Tag punch from the 2021-2022 Annual Catalog. And the sparkly paper? The Be Dazzling 6×6 Specialty Paper is free with a $50 purchase during Sale-a-bration in August and September.
Welcome to the Stampin’ Pretty Pals’ Blog Hop! This month, the theme is “My Happiest Season”. We really hope that you enjoy and will be inspired by them! As you hop from blog to blog, don’t forget to leave comments because we love hearing from you. You will find the lineup at the end of my post to help you “hop” along from Pal to Pal.
When I saw the theme of “My Happiest Season”, I struggled to decide on my favorite season. I have grown up with all four seasons (sometimes all in one day!) and I missed them when I lived in Ecuador. Each season has unique qualities and positive aspects and I really don’t hate any of the seasons. Sure, I wish we had more snow to go along with our cold temperatures in the winter. Rain and 40 degrees Fahrenheit just isn’t pleasant. I get annoyed with spring in North Carolina because I need all my summer and winter clothes within the same week. I am not wild about upper 90’s and getting sunburned during the summer. Did I mention the humidity? Fall is similar to spring in that the temperatures are unpredictable and you can’t plan a Halloween costume until the week of. With all that, I realized that it isn’t the weather that determines my favorite season but the events. My life has revolved around school my whole life. I have been a student or teacher since the age of four and my father was a graduate student or professor for much of my life. Fall brings the start of the new school year as well as lots of special days. My birthday is in September followed by my father in October and my oldest daughter and mother in November. On top of that we have Labor Day, Fall Equinox, Halloween, Thanksgiving, and the list goes on. Fall also brings beautiful colors with the changing of the leaves and who could forget pumpkin spiced everything! So, I chose to focus on fall for my card.
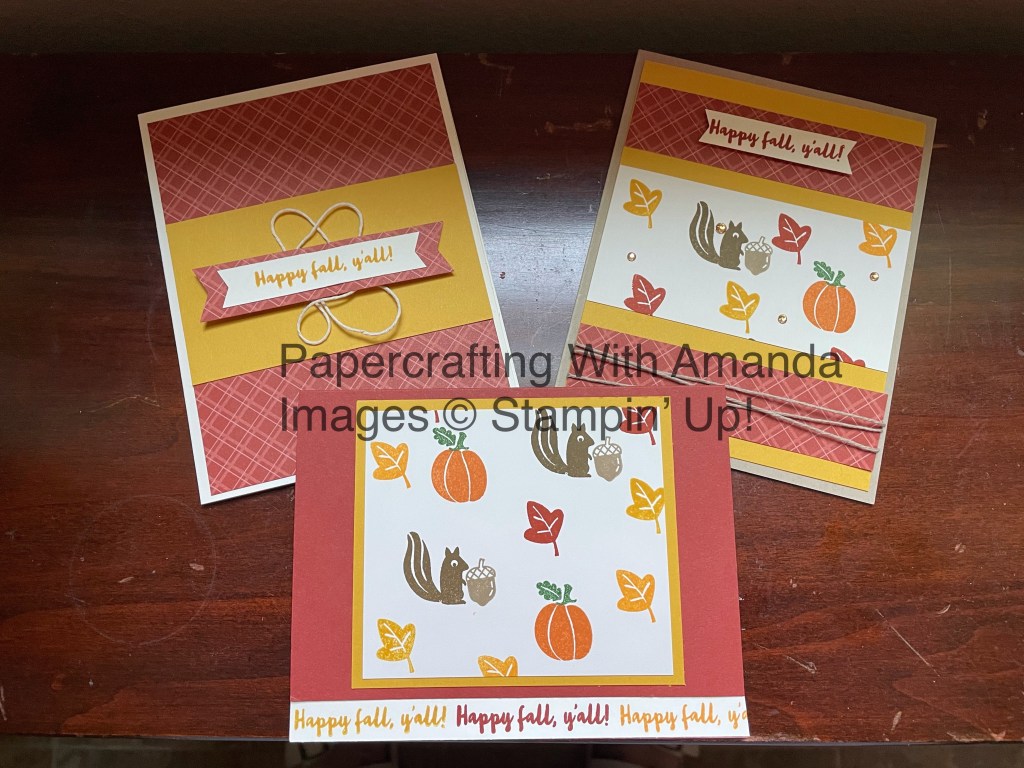
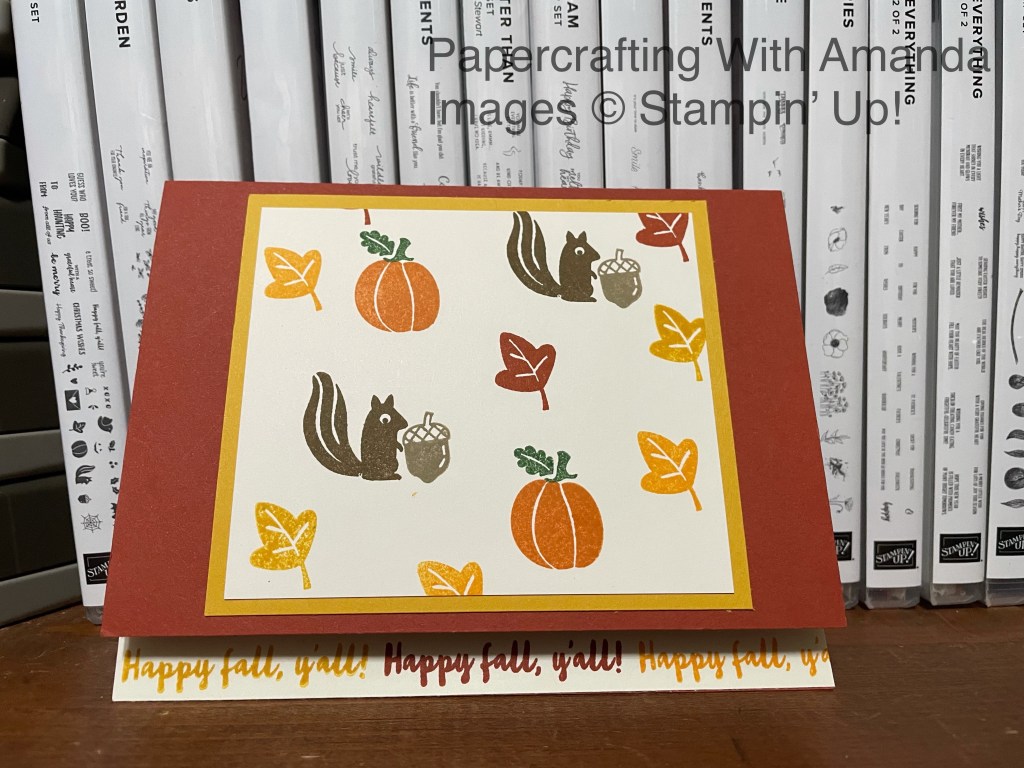
Really, I should say cards because I actually made three. I decided to use the Banner Year stamp set because of the cute little fall images and as someone who has lived in the south since the age of seven, I couldn’t resist the sentiment. “Happy Fall, Y’all!” I began with a 4″ x 5 1/4″ piece of Very Vanilla cardstock and stamped the cute fall images to create my own patterned paper. I used soft Suede for the squirrel, Crumb Cake for the acorn, Pumpkin Pie for the pumpkin, Garden Green for the pumpkin stem, and Mango Melody, Cajun Craze, and Crushed Curry for the leaves. When I pulled out a piece of scored Cajun Craze cardstock that I thought was already cut as a card base, I discovered it was only 8″ x 5 1/2″ so the front was 1/2″ smaller. Rather than get a new sheet of cardstock, I decided to attach a strip along the bottom with the sentiment repeated in Crushed Curry, Cajun Craze, and Mango Melody. I then cut the patterned piece to 3 1/4″ x 3 3/4″ and added a piece of 3 1/2″ x 4″ Crushed Curry. Simple and easy!
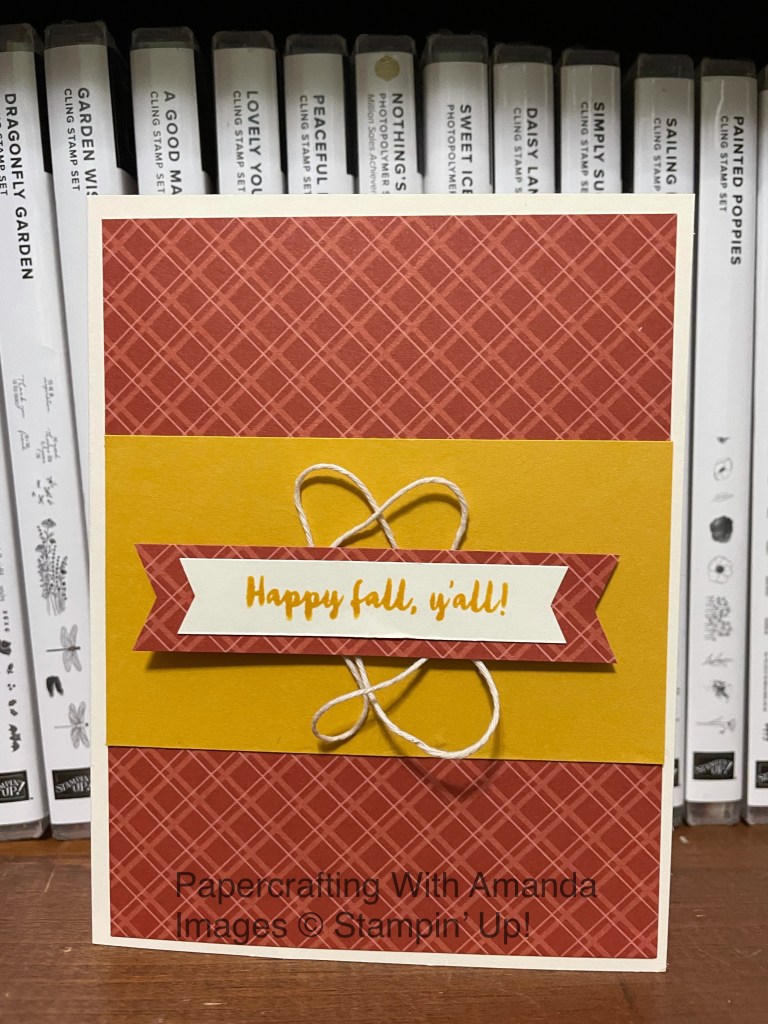
This meant I was left with a 2″ x 4″ piece of patterned paper. I couldn’t just throw it away (or recycle it), I had to make another card! I remembered I had the Regals 6×6 Designer Series Paper and pulled out a piece of Cajun Craze. I trimmed it to 4″ x 5 1/4″, intending to use it as a background for my patterned piece. It didn’t look right so I turned to the 2″ x 6″ leftover piece. I trimmed it to two pieces of 1″ x 4″ an arranged it on a piece of Crushed Curry. I then stamped the sentiment on Very Vanilla and used the Banner Pick A Punch to trim the ends. I then added some Champagne Rhinestone Basic Jewels and Crumb Cake twine and mounted it all on a Crumb Cake card base.
If you have been keeping track you know that I still had that piece of Cajun Craze 6×6 DSP that needed to be used. Plus, I had been using a piece of Crushed Curry that had been miscut to 4″ x 11″ for the pieces on the previous two cards. Rather than toss it in the scrap bin and call it a day, I layered the 2 1/4″ x 4″ Crushed Curry on the Cajun Craze DSP onto a Very Vanilla card base. I also realized that I had piece of the DSP leftover and it was perfect to layer the sentiment on – 3/4″ x 4″. I once again stamped the sentiment in Crushed Curry on a 1/2″ strip of Very Vanilla and trimmed both pieces with the Banner Pick a Punch. Since I had already pulled out the Baker’s Twine Essentials Pack, I decided to add a piece of Very Vanilla twine. Once again, a simple card that helped use leftover pieces.
Stampin’ Pretty Pals Blog Hop
More inspiration awaits, so use the lineup below to visit the rest of the Design Team. The Pals are excited to show you what they’ve created! Then, please mark your calendars for our next blog hop on September 8th. Our theme will be “Focus on the Sentiment” when our Design Team creates a project showcasing a sentiment as the focal point of their project. Until then, have fun in your craft space.
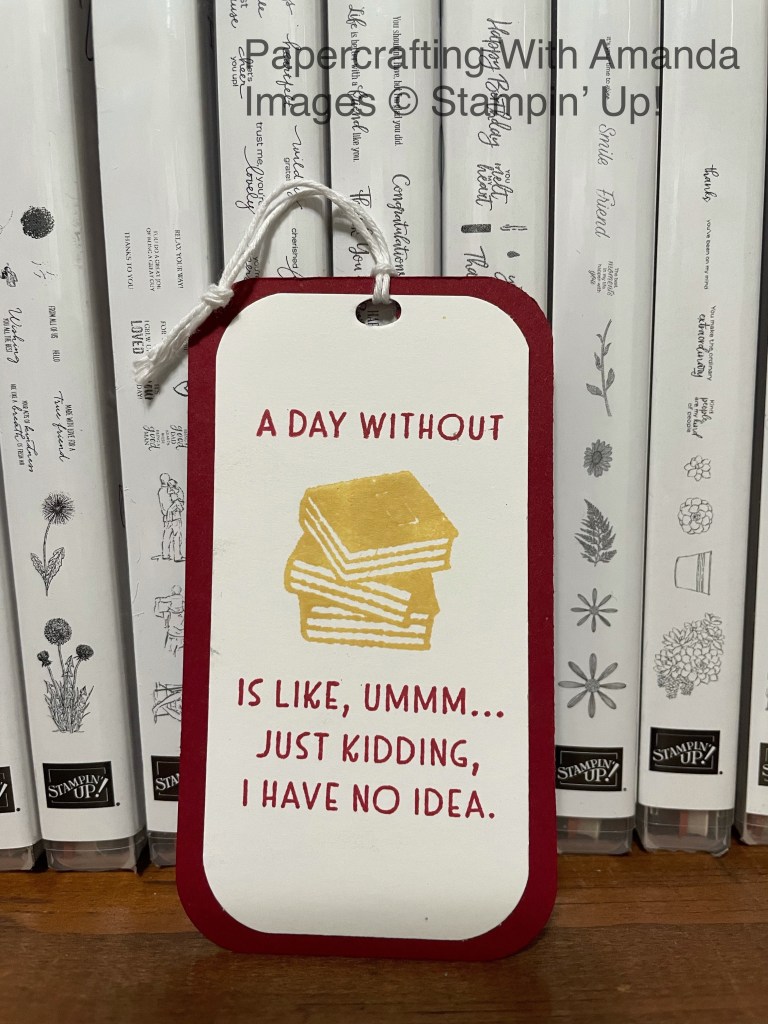
Today is Book Lover’s Day. When I discovered this, I thought about reading all day. After all I have stacks of books that I want to read and haven’t gotten to yet. Then I decided to make a bookmark.
To do this I chose the Make It Happen and Nothing’s Better Than stamp sets. I layered a 1 3/4″ strip of Basic White on a 2″ strip of Cherry Cobbler.
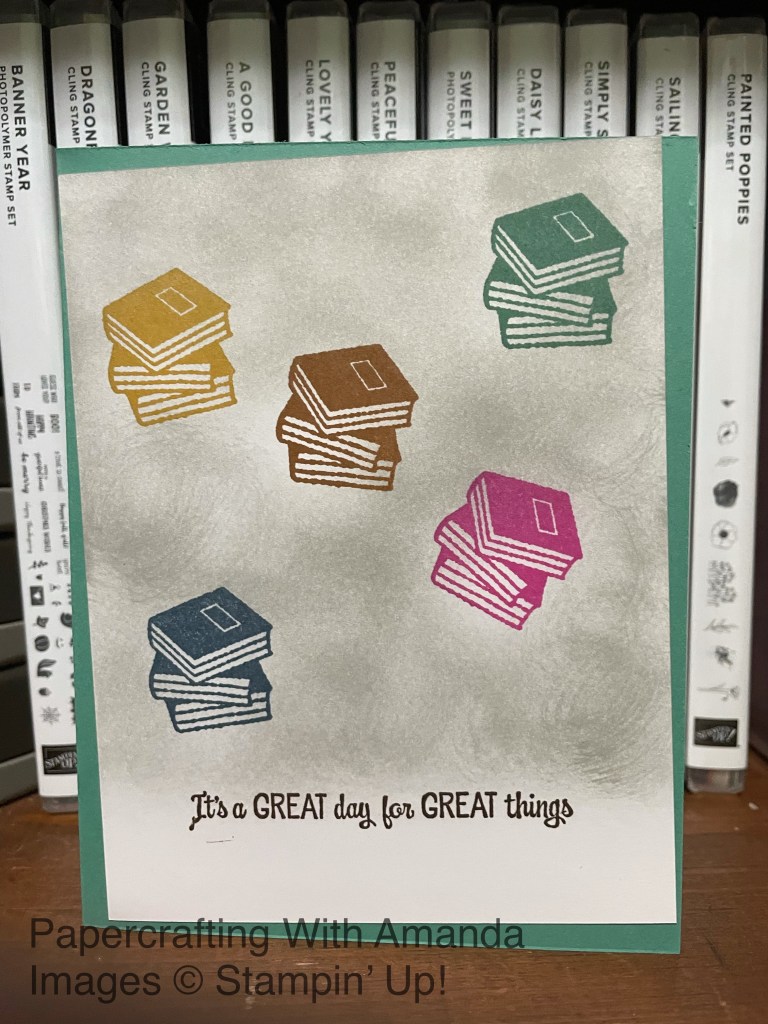
Once I got started it is hard to stop papercrafting. Next I decided to make a card with lots of books. This card features the 2020-2022 In Colors along with a sentiment from Make It Happen stamp set.
I looked back at the Nothing’s Better Than stamp set and had one more idea for a card. The sentiments “today is a” and “kind of day” just made sense. It was fun using the sponge daubers to create the spots.
I hope you enjoyed these projects as much as I enjoyed making them. Now, off to read a book, but which one? It is so hard to choose.
Welcome to the Stampin’ Pretty Pals’ Blog Hop! This month, the theme is “Wonderful Cards/Projects from the Garden” where our design team showcase projects from things found in a garden, such as flowers, vegetables, fruits, or even a garden scene. We really hope that you enjoy and will be inspired by them! As you hop from blog to blog, don’t forget to leave comments because we love hearing from you. Once you finish here, you will find the lineup at the end of my post to help you “hop” along from Pal to Pal.
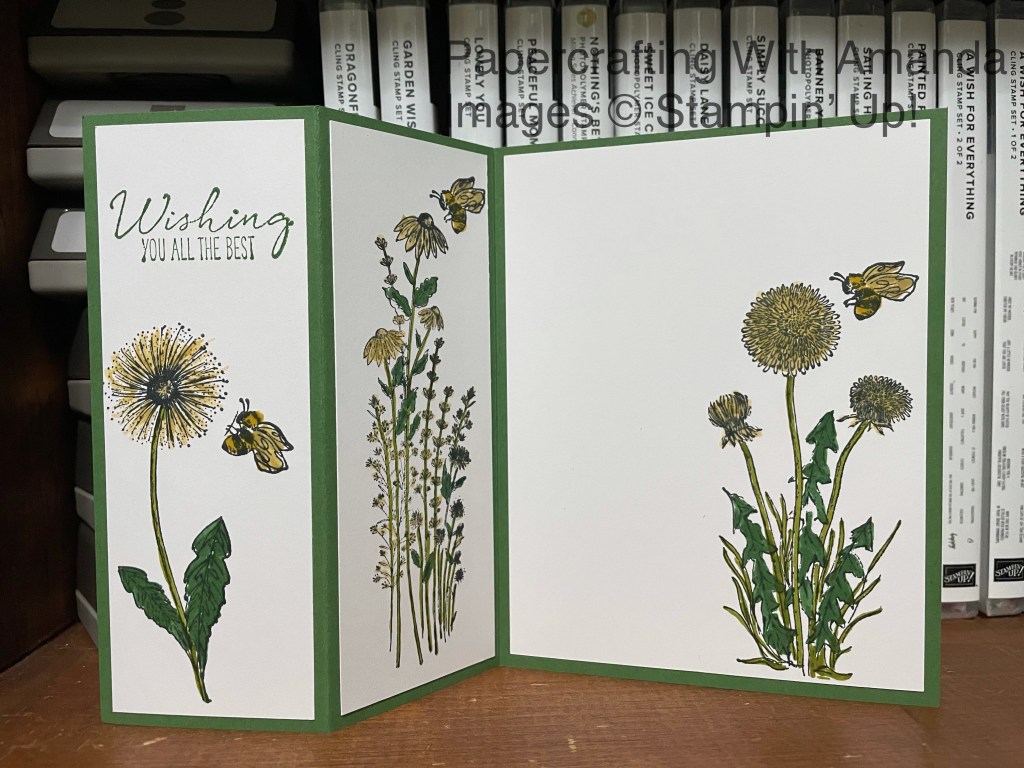
When I saw the theme of garden, my mind immediately went to the Garden Wishes stamp set and Dragonfly Garden stamp set from Stampin’ Up!. I realize that there is the obvious connection of the word garden in the title of both stamp sets. In reality, it was the images of wildflowers and insects that attracted me. I am not a gardener. I don’t like the idea of having to plant annuals year after year. Besides I don’t like dirt under my finger nails and I am allergic to several types of pollen. That said, I like the beauty of wildflowers and what many people consider weeds. Dandelions sprout where they want, spread where they want, and have several different looks. Bees and other insects are such an important and underappreciated part of a garden. Don’t get me wrong, there are other creatures I like more than bees and dragonflies, but I appreciate the important role they play and let them do their thing.
Bridge fold card
When I saw the dies and thought of how to create a garden card, my mind went to this fun fold – the bridge card. It gives the card depth and is a great display card. It was definitely tempting to add lots of flowers and layers but I didn’t want to overwhelm. It was fun trying to figure out which elements to include and how to position the elements. I used Tombow Removable Adhesive be able to build the card and move things around until I had it the way I wanted it.
Memento Ink for Stampin’ Blends
I started with a 4 1/4″ x 8″ piece of Garden Green cardstock. I scored the long side at 1 1/4″, 2 1/2″, 5 1/2″, and 6 3/4″. The inner scorelines (2 1/2″, 5 1/2″) are valley folds and the outer scorelines (1 1/4″, 6 3/4″) are mountain folds. I then added another piece of Garden Green cardstock, cut 1 1/4″ x 5 1/2″. The ends are attached at the bottom and along the outside of the wings with adhesive. I also cut 2 pieces of 1″ x 4″ Basic White, one piece of 1″ x 3″ Basic White, and one piece of 2 3/4″ x 4″ Basic White. I stamped the sentiment on the piece of 1″ x 3″ Basic White cardstock. In the top left of the 2 3/4″ x 4″ piece of Basic White I stamped the center of the flower from Garden Wishes in Daffodil Delight ink. On scraps of Basic White I stamped the single dandelion and four bees from Garden Wishes in Memento Tuxedo Black ink. I colored the bees with the Bumblebee Stampin’ Write Marker and the dandelion with Daffodil Delight and Old Olive Stampin’ Blends. I then pulled out the Dandy Wishes dies to cut out the bees and dandelion using the Mini Stampin’ Cut & Emboss Machine. I then cut out the grass and leaves from Garden Green cardstock and the pokey flower from Daffodil Delight. Finally I cut out the other flower and descending size pieces from Daffodil Delight, Bumblebee, So Saffron, and Crushed Curry cardstock. I colored the stem of both of the flowers with Old Olive Stampin’ Blend. Then it was time to assemble the card. I finished off the card with a little bow made from Linen Thread and some Wink of Stella on the bee wings.
Z fold card
As you can see, I couldn’t stop with one card. I created another card using only the stamped images – no die cuts on this card, just stamps, ink and paper.
Stamping prep done
The card base is 5 1/2″ x 8 1/2″ scored at 2 1/8″ and 4 1/4″ along the long side of the Garden Green cardstock. There are two pieces of 1 7/8″ x 5 1/4″ Basic White Cardstock and one piece of 4″ x 5 1/4″ Basic White Cardstock. Once again the images are stamped with Memento Tuxedo Black ink and colored with Daffodil Delight and Old Olive Stampin’ Blends.
Inside of card
Stampin’ Pretty Pals Blog Hop
More inspiration awaits, so use the lineup below to visit the rest of the Design Team, because the Pals are excited to show you what they’ve created! Then, please mark your calendars for our next blog hop on August 11th. Our theme will be “My Happiest Season” when our Design Team creates a project showcase projects inspired by their favorite season of the year. Until then, have fun in your craft space.
Welcome to the June 2021 Edition of the NC Demos Blog Hop! We are so glad you are here! If you have already stopped to see what the awesome project Toni Campana created this month you know that our June theme is Summer!
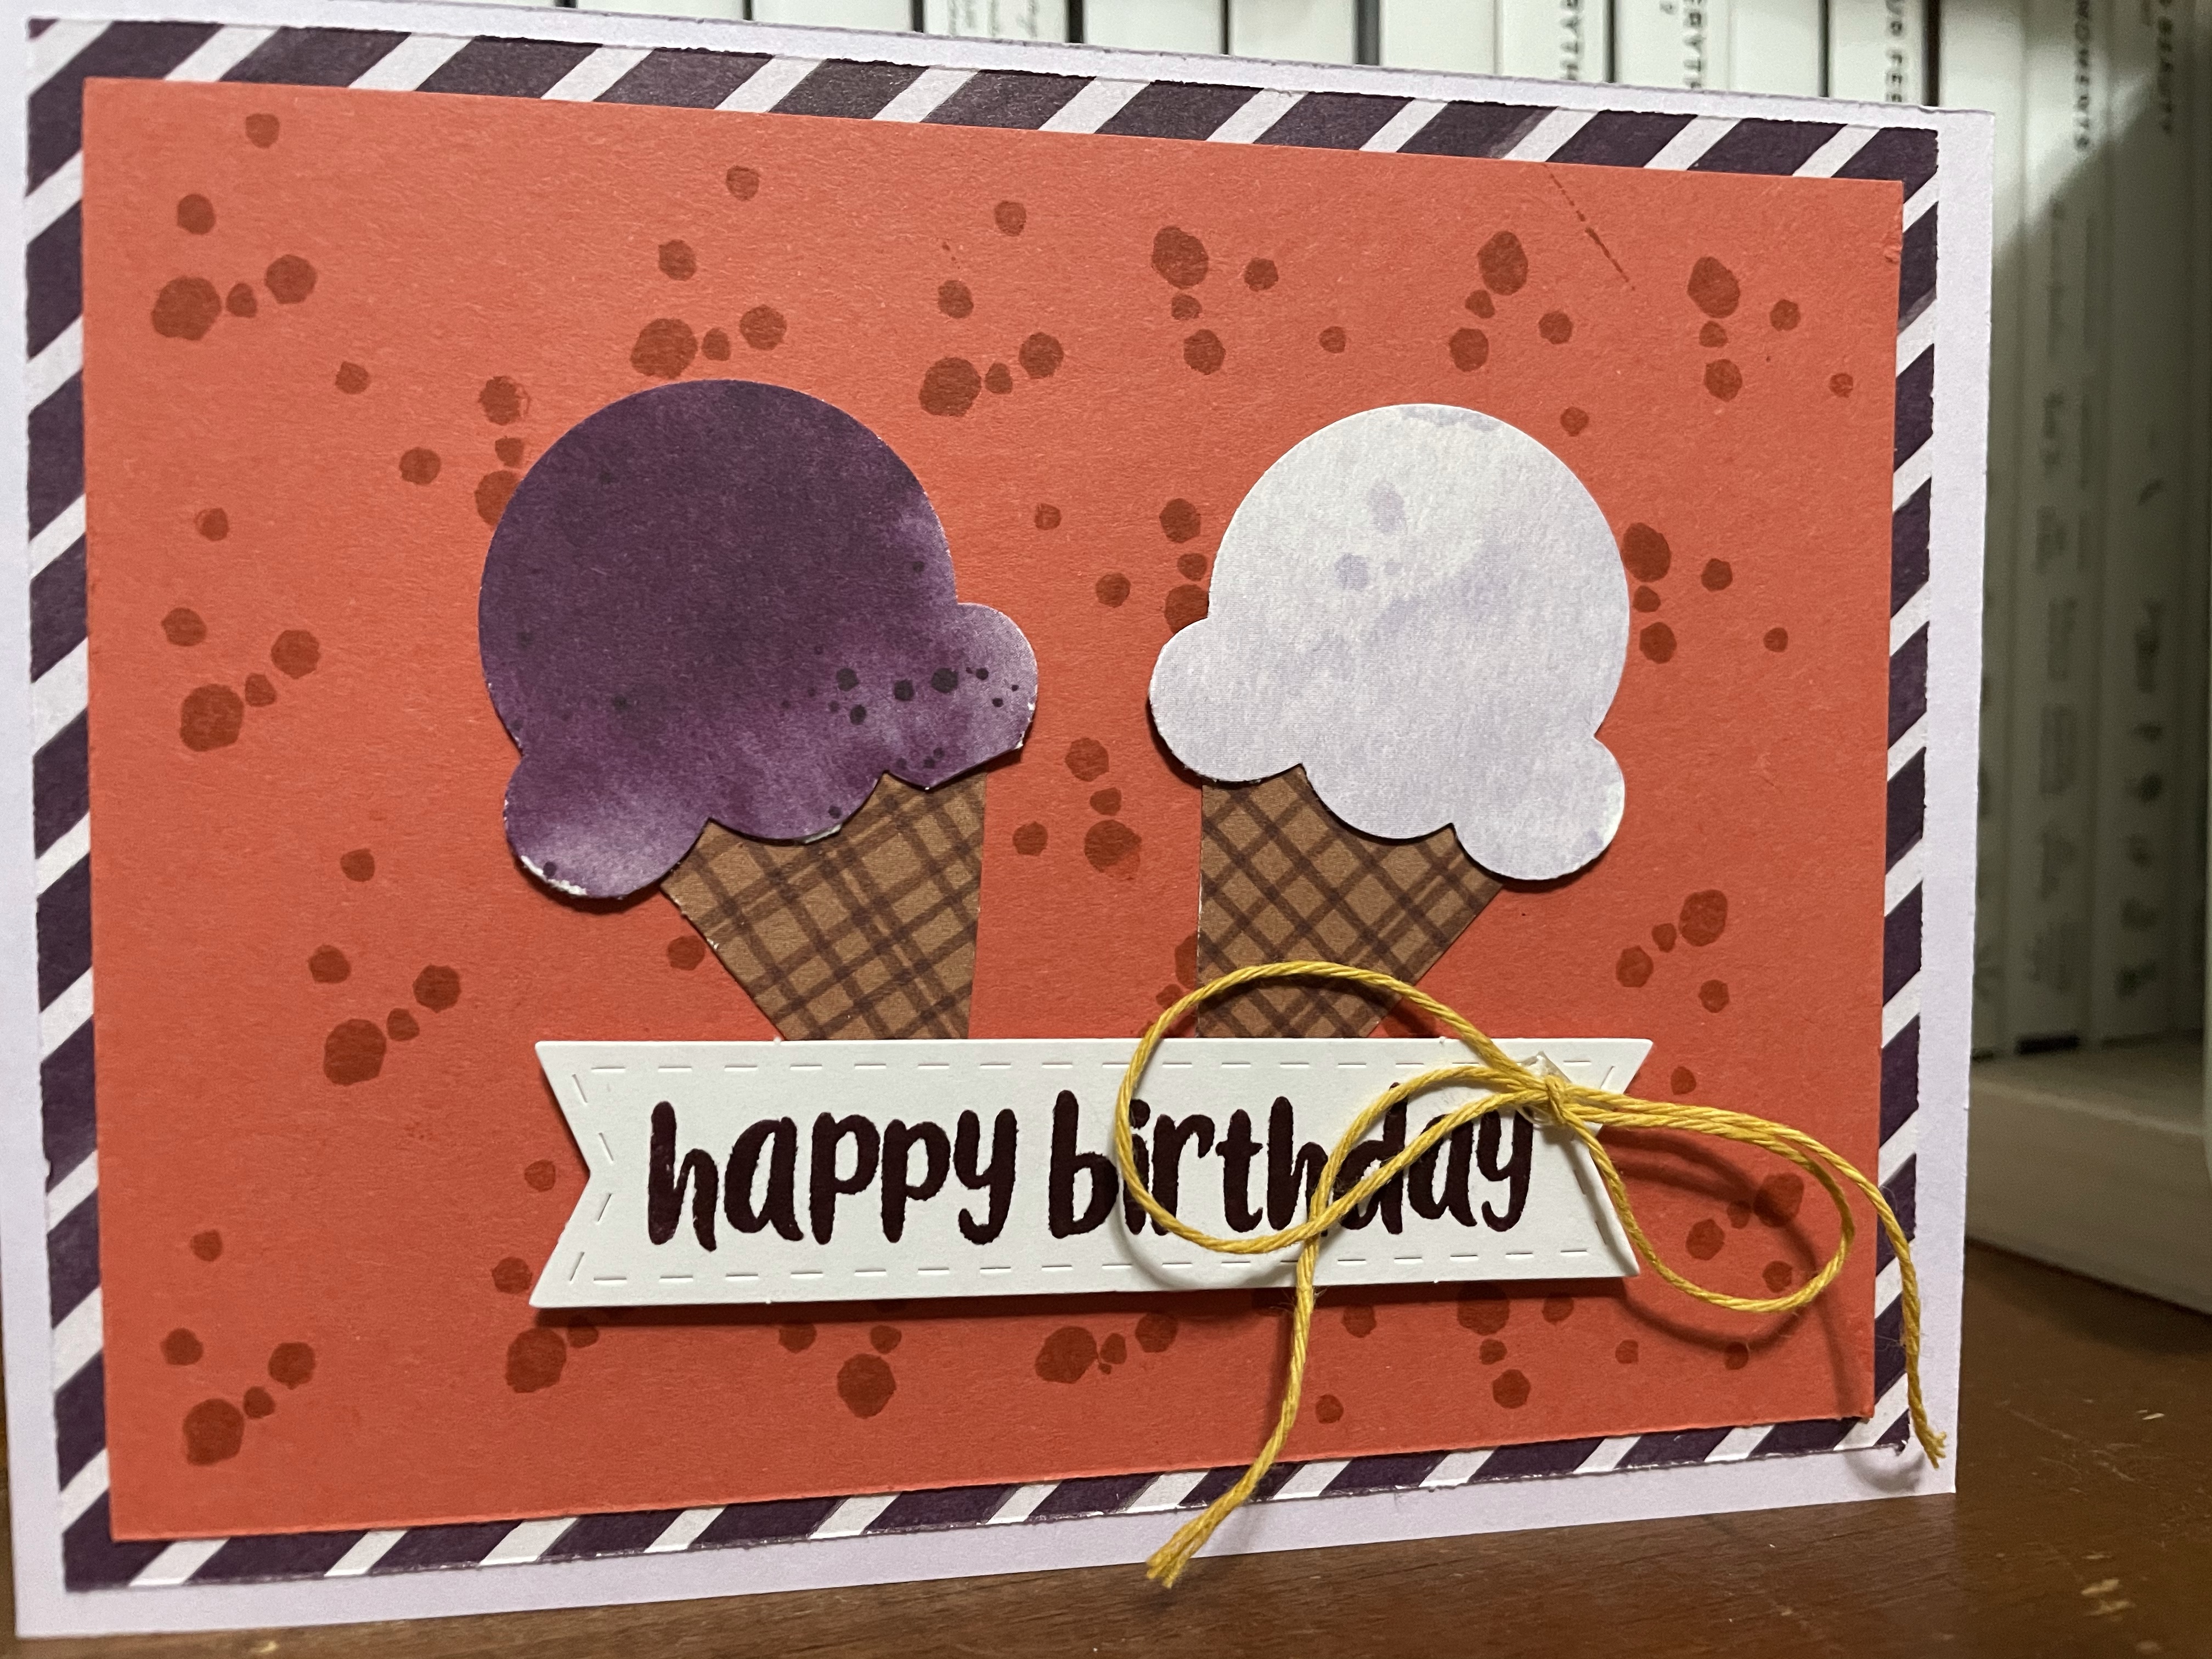
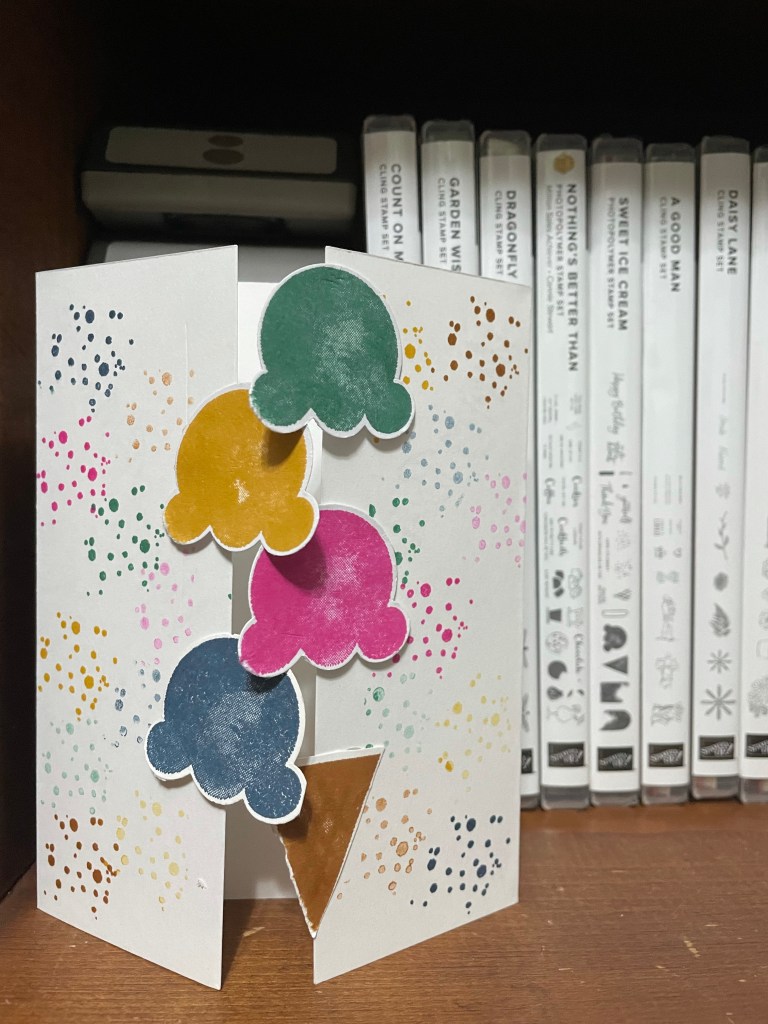
What is the best thing about summer? Ice cream, of course! It doesn’t matter that I am lactose intolerant and that I eat ice cream all year. I always associate ice cream and summer. When Stampin’ Up released the Ice Cream Suite in the January-June Mini Catalog, I held off. I wasn’t thinking of cards with ice cream cones or popsicles in January.
Then Paper Pumpkin came along in April with the So Cool and I was closer to being ready. I could put the kit together and think about summer. These are a few of the alternatives I put together after I put together one card of each design.
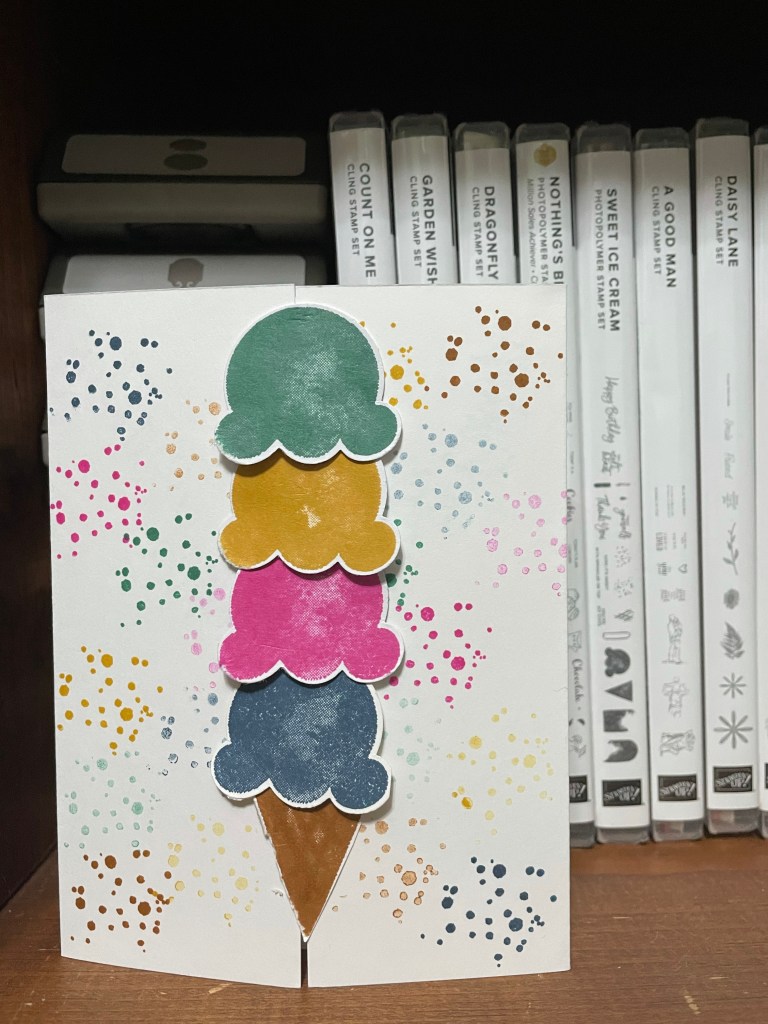
Finally June came along with all the summer birthdays and I needed cards. I looked at the stamp set and punch and decided it would be fun to make a stacked cone with the 2020-2022 In Colors.
Look carefully and you will notice it is a gate fold card. That’s right, not only are the scoops of ice cream stacked, they are interlocking. This makes for an even more fun fun-fold card. I love fun fold cards and the gate fold card is a great basic one. The problem with them, however, is that they often won’t stay closed. So, by overlapping the scoops of ice cream, the gate is locked!
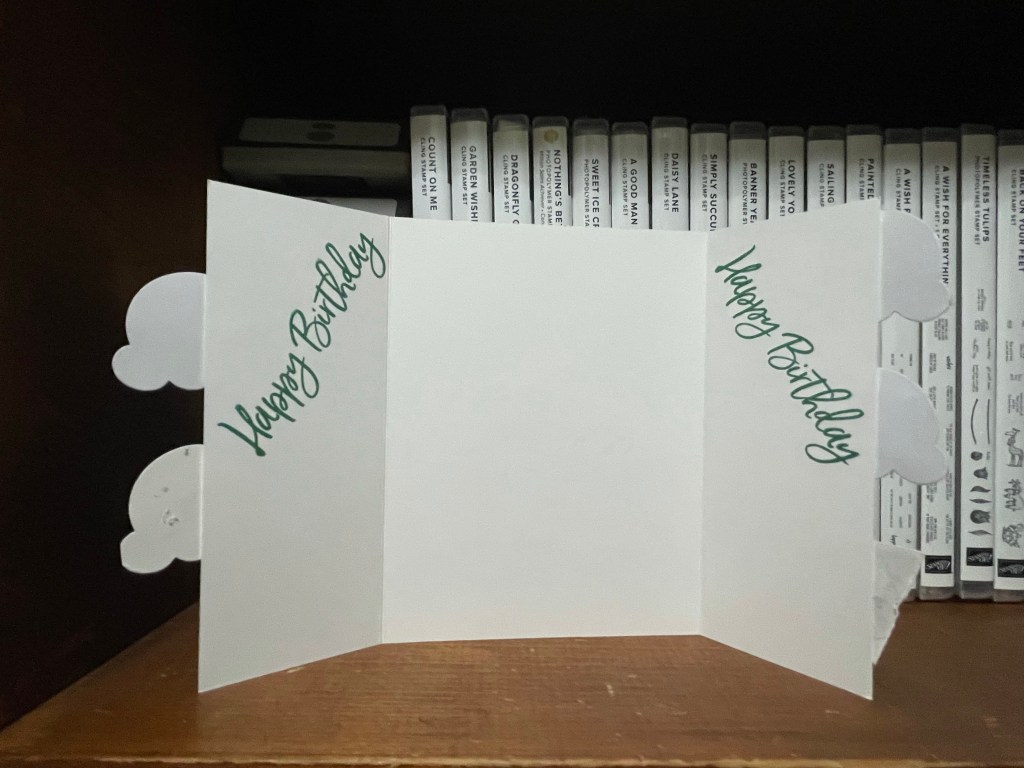
I also decided to put the sentiment on the inside, which I rarely do. I usually leave the inside blank to allow for room to write. However, the gate fold gave me two flaps where I could stamp a sentiment and leave the middle blank for writing.
I hope you will try this card for yourself. It only used a card base of Basic White 5 1/2” x 8 1/2” and scraps for the scoops and cone. I scored on the long side at 2 1/8” at each end. Rather than use Designer Series Paper, I used one of the stamps to create the spots, once again using all the In Colors. I stamped once full strength and then again without reinking. This allowed for light and dark versions of each color. The products are listed below.
Basic White 8 1/2″ x 11″ Thick cardstock #159229
Misty Moonlight Classic Stampin’ pad #153118
Just Jade Classic Stampin’ pad #153115
Bumblebee Classic Stampin’ pad #153116
Cinnamon Cider Classic Stampin’ pad #153114
Magenta Madness Classic Stampin’ pad #153117
Sweet Ice Cream stamp set #158224
Ice Cream Cone builder punch #154241
Mini Glue dots #103683
Thank you for letting me share my project. I am so happy that the Sweet Ice Cream stamp set and Ice Cream Cone Builder Punch carried over to the 2021-2022 Annual Catalog. However, you only have until June 30 to buy the bundle (#156244) and save 10%. Contact me today or shop my Online Store 24/7 to buy this amazing bundle.
I hope you keep hopping with us to see the post Laurie Meier has on summer. I know it will be great!
I will be honest. Initially I did not like Paper Pumpkin. I am not talking about one month. I didn’t like the concept. I didn’t want to use a kit that someone else created and my cards looked manufactured. I wanted to create my own cards that were unique and handmade. Then I tried it.
I have come to love Paper Pumpkin. To be honest, the main reason I love it is because I can create when I am tired or on the go. I don’t have to spend time coming up with designs. I don’t have to gather all the supplies. I can open the box, grab my scissors and bone folder, and create. After I make the predesigned cards (and have more energy), I can create alternatives.
May 2021 Paper Pumpkin Kit
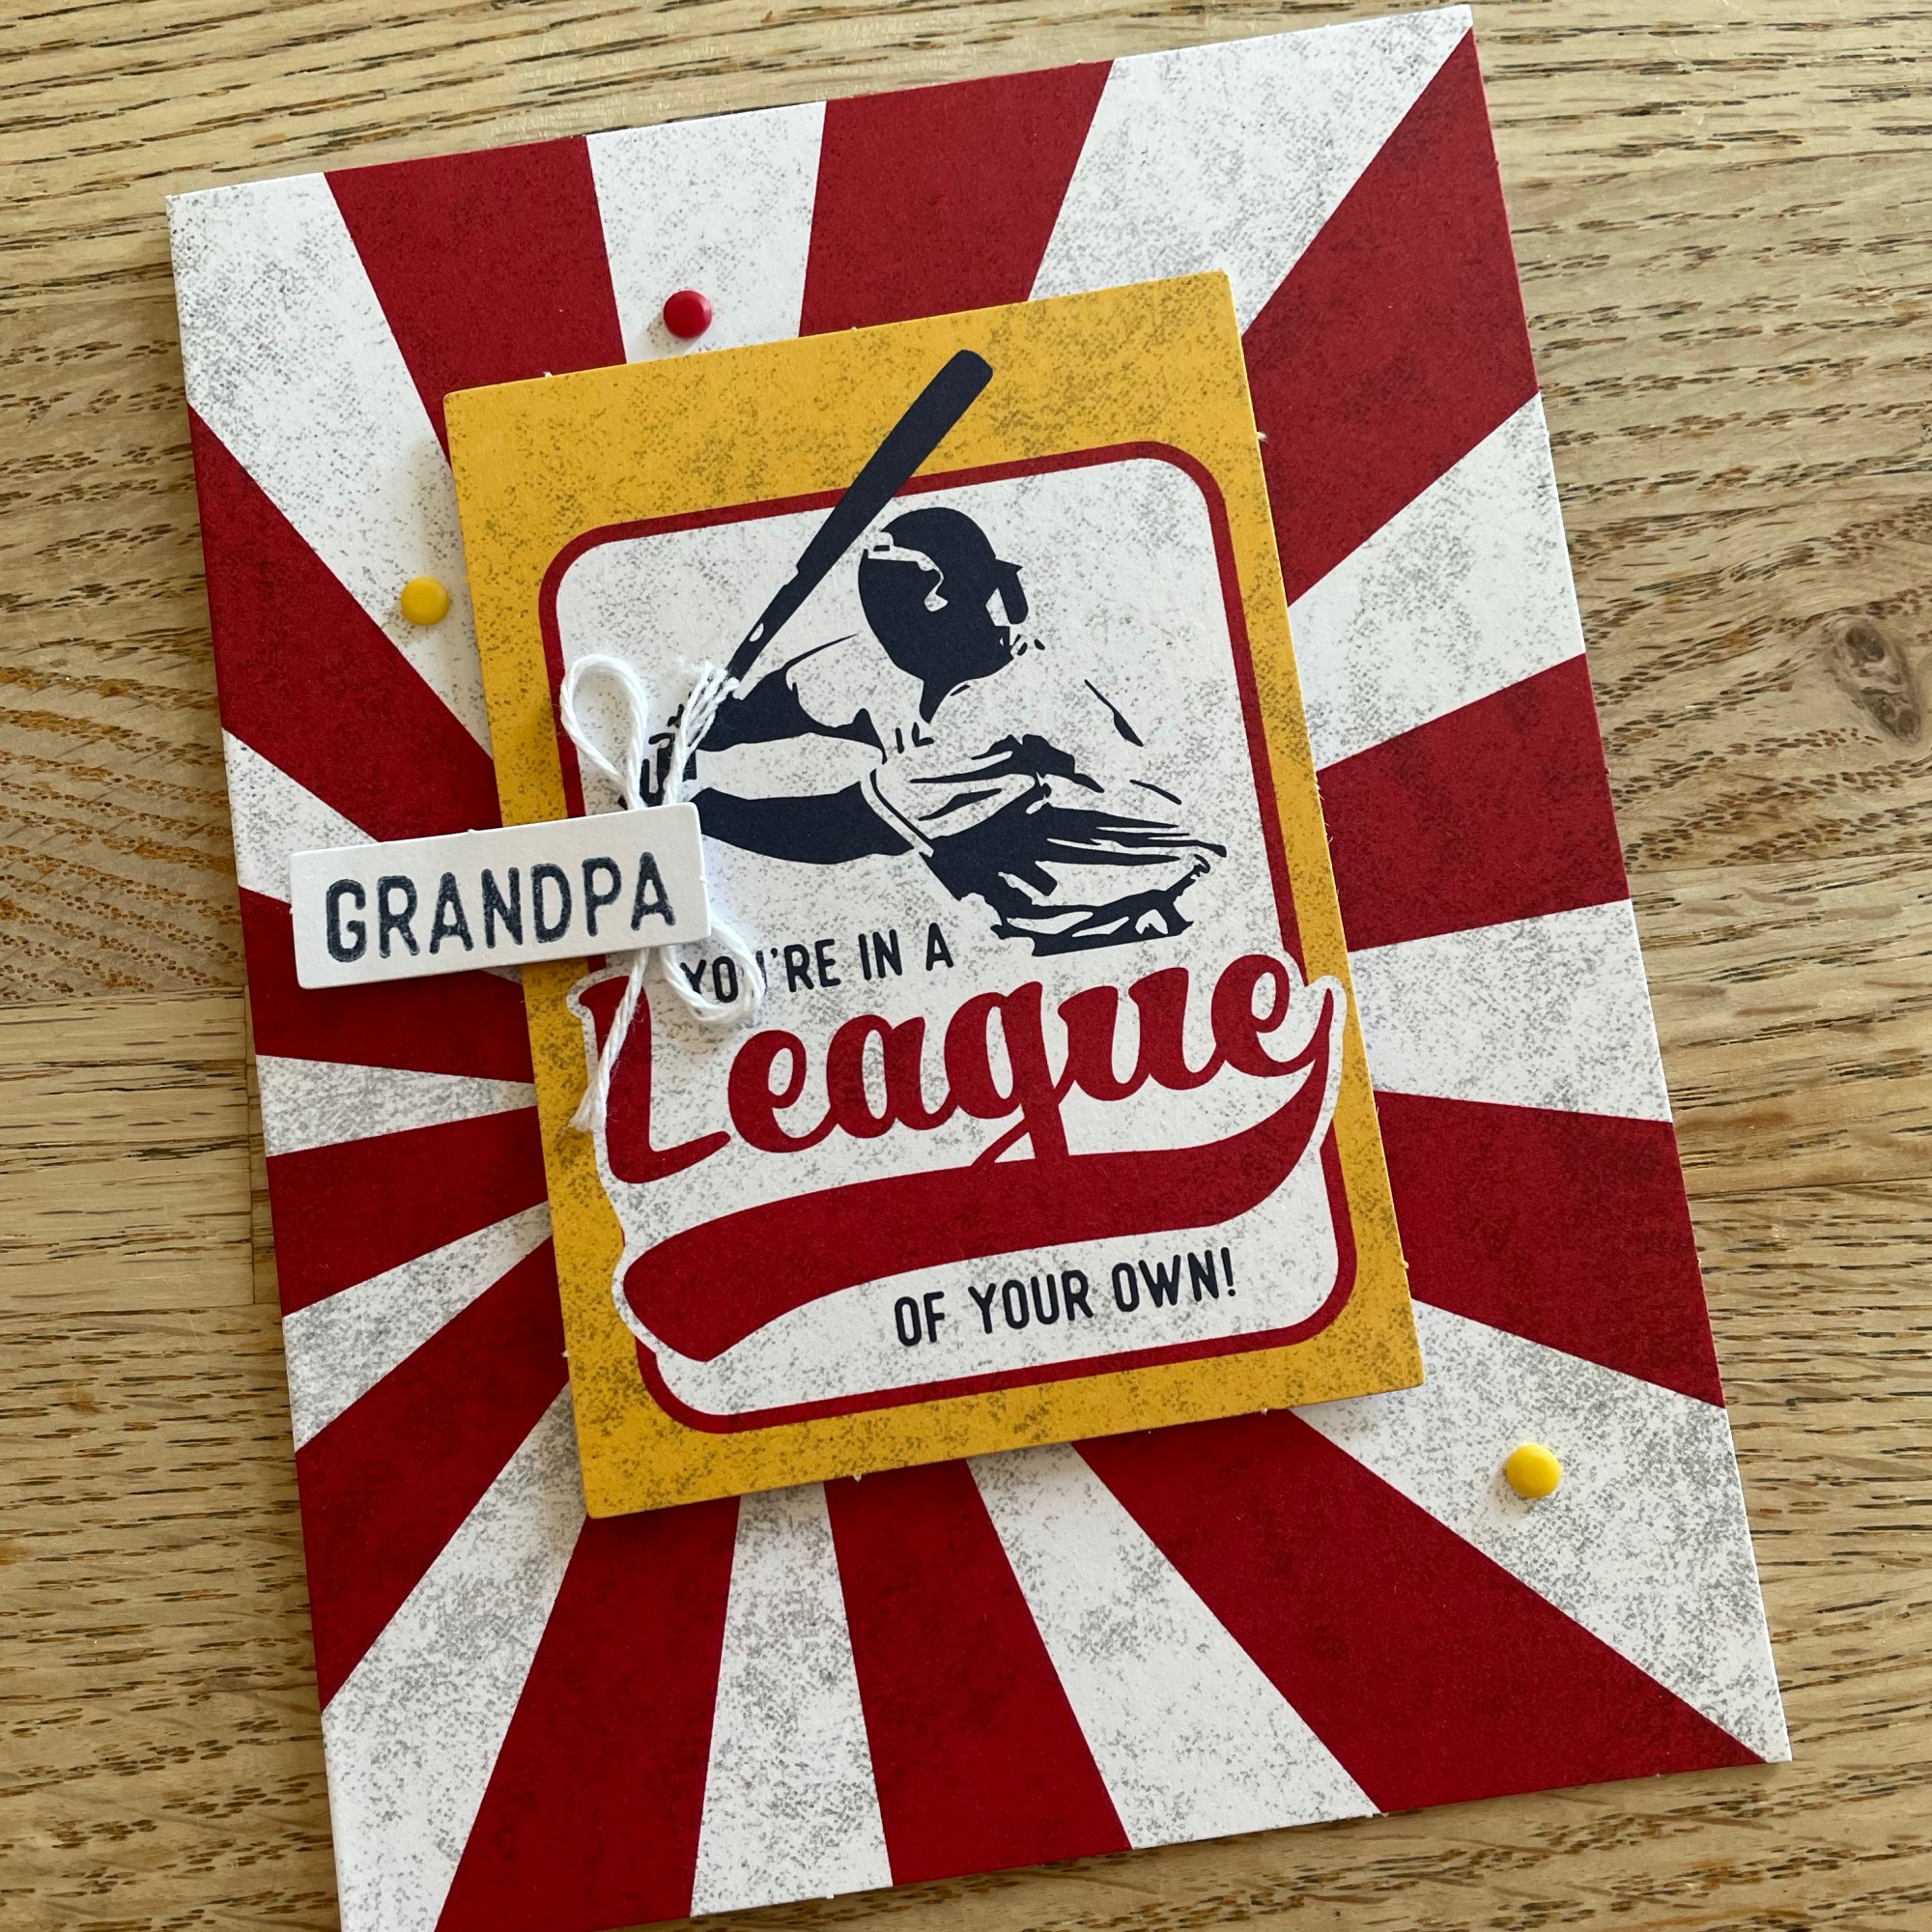
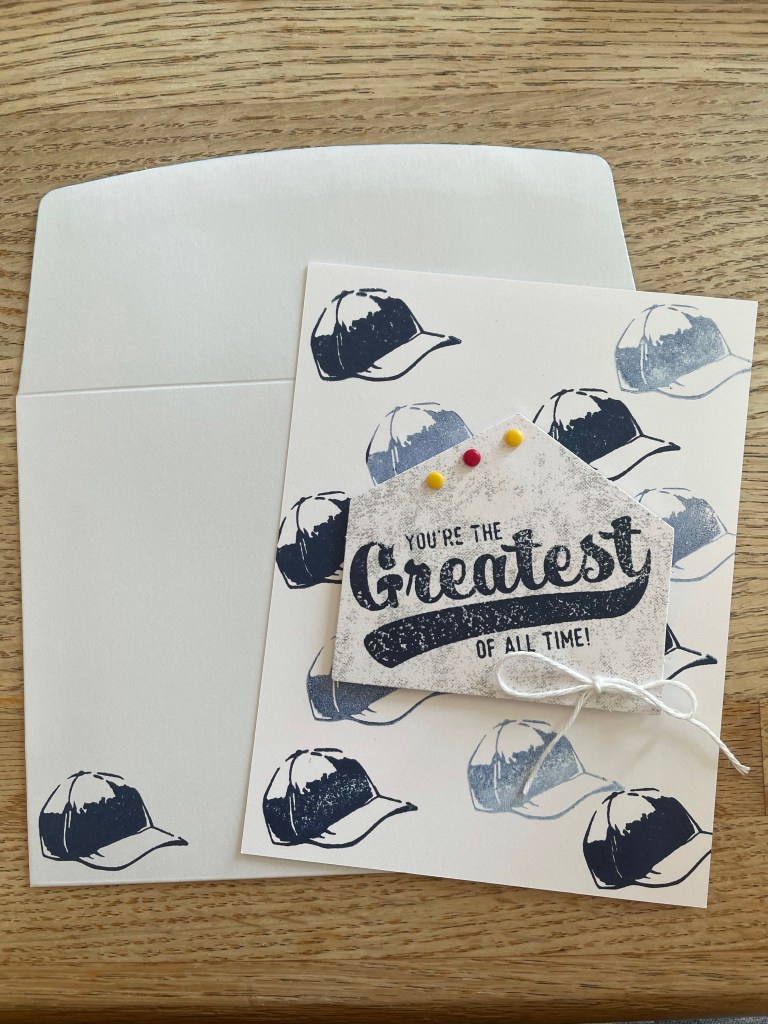
The June Paper Pumpkin was a stretch for me. I am not a baseball fan. I started by creating one each of the predesigned cards. I was tired, it was the end of the week so that was as far as I got.
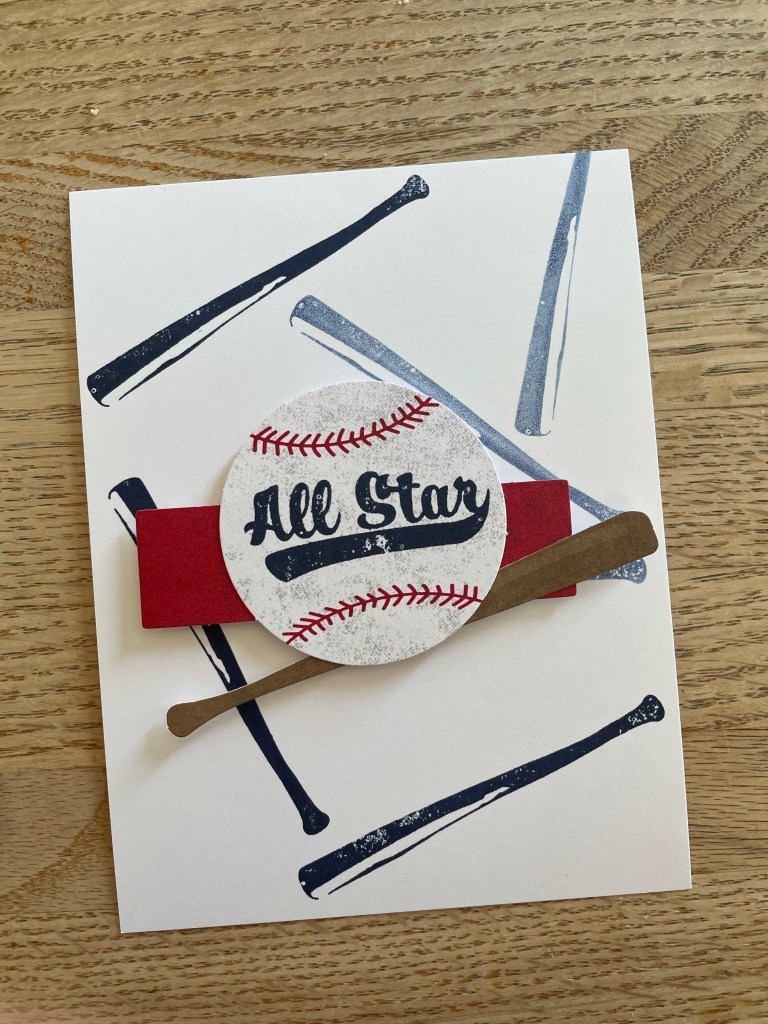
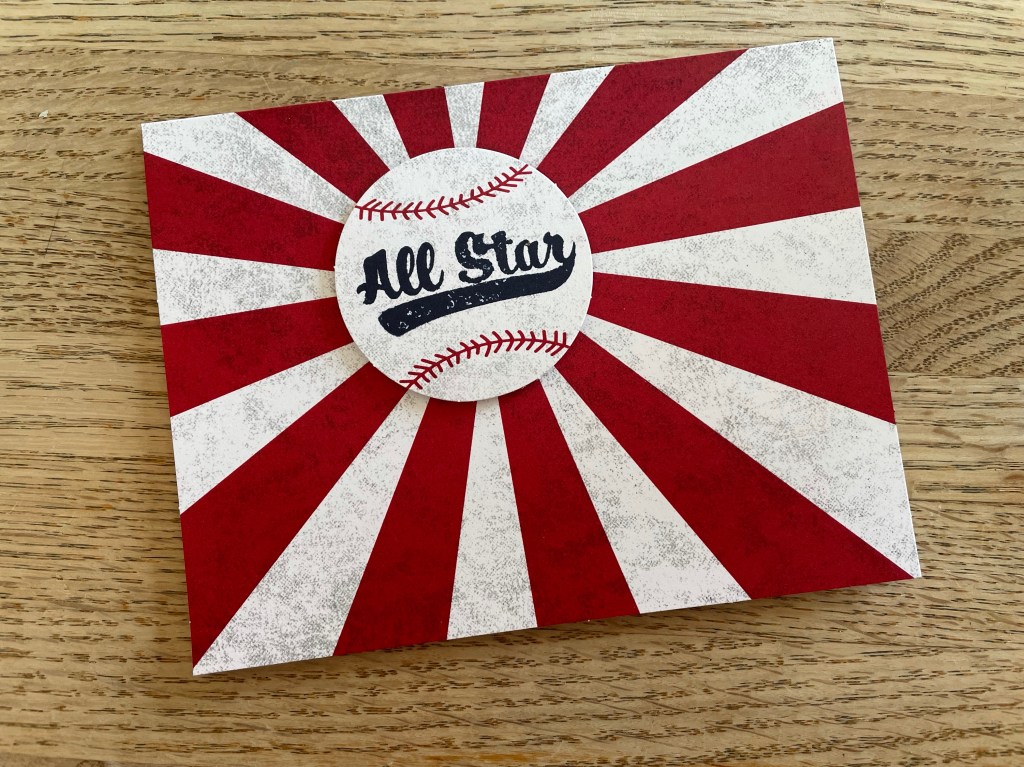
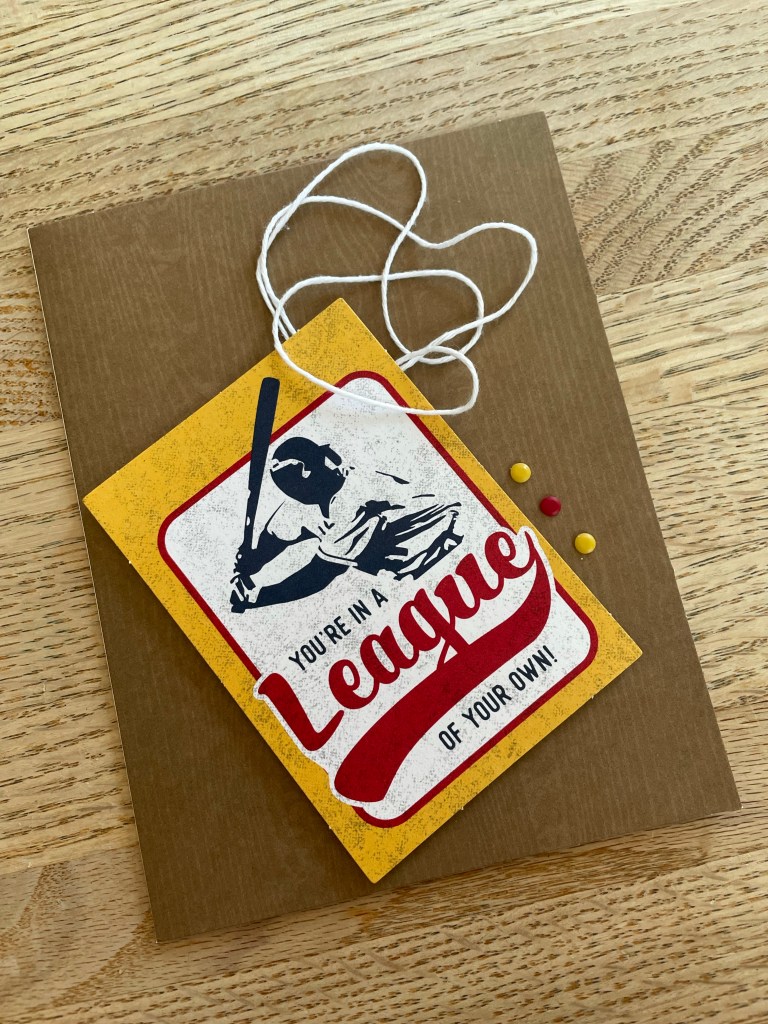
Then I went on a trip. I took the kit and a few white 5 1/4″ x 4″ card fronts, that’s it. I wanted to see what I could create with the remaining pieces and the stamp set. Here’s what I came up with:
It was fun creating some simple alternatives without adding extra supplies (other than the additional card fronts). I hope you enjoyed these alternatives. I am looking forward to the June Paper Pumpkin which should be arriving to my mailbox any day now.
Welcome! I am glad you have found this site. I am looking forward to sharing my love for papercrafting with you. I will share projects I have created, new products from Stampin’ Up, and anything else that makes sense to share. First a little bit about me.
I have been a Stampin’ Up Demonstrator since June 2015. I have been papercrafting most of my life, changing my medium occasionally. As a child I loved stickers! I would collect them, arrange them on papers, tell stories with them. I also enjoyed origami and dabbled with it on and off over the years. At some point I found rubber stamping and played with it to create cards, designs on paper, decorative items. In high school I discovered scrapbooking and started to explore the possibilities. Through college I did a little here and there. As a mom I had high hopes of creating scrapbook after scrapbook but just didn’t have the time as I was also a high school Spanish teacher and involved with my church. I wanted to craft but I needed it to be practical and easy to finish in a short time. And that it is why I returned to cardmaking and similar projects. I love being able to create something in less than an hour, especially when it is a special occasion and a card is needed. I love being able to create cards to send to my students, colleagues, friends, and family. No need to go to the store to pick out a card. I can customize the card for the recipient or choose from my stash as needed.
One of my first cards using Stampin’ Up products
As I mentioned, my full time job has been as a Spanish teacher in a public high school. As a demonstrator, I enjoy putting together classes to socialize and share my love of papercrafting. I love showing how to put something together or explaining something new. While I would love to invite everyone to my dining room for an in-person class, I know that just isn’t possible. My hope is that through this site I am able to share my ideas and knowledge just as I would in an in-person class and ultimately share my love for papercrafting.